Photography Tips
Photographing Your Scale Models
Great model photography doesn’t require an expensive camera or studio. A few simple choices involving lighting, background, focus, and composition can make a dramatic difference—even when using a smartphone.
1. Start With Good Lighting
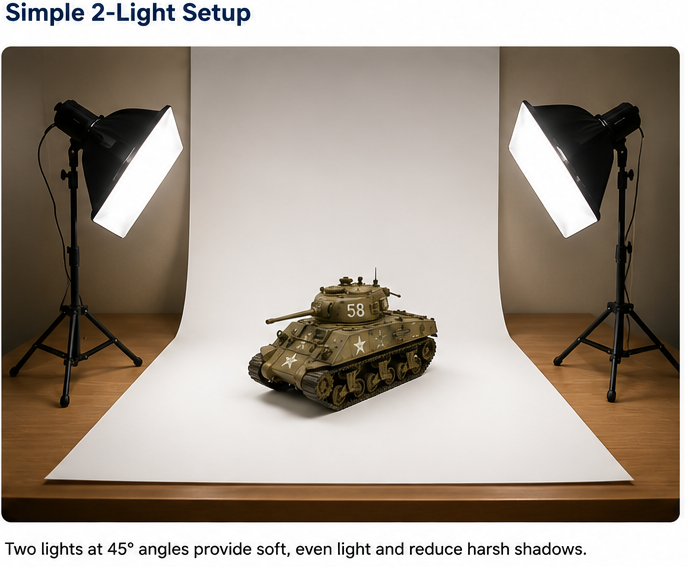
Soft, even lighting brings out the details of your model without harsh shadows or blown-out highlights.
- Use two lights positioned roughly 45 degrees to either side of the model.
- Add a third light from above or slightly behind when additional separation is useful.
- Avoid direct on-camera flash whenever possible.
- Avoid relying only on harsh overhead room lighting.
- Daylight can work well, but avoid strong direct sunlight.
- Diffuse strong light using a softbox, diffusion material, translucent white material, or another safe purpose-built diffuser.
- Try to keep the color temperature of your lights reasonably consistent.
- Move lights farther away or diffuse them more if highlights are too harsh.
2. Use a Clean Background
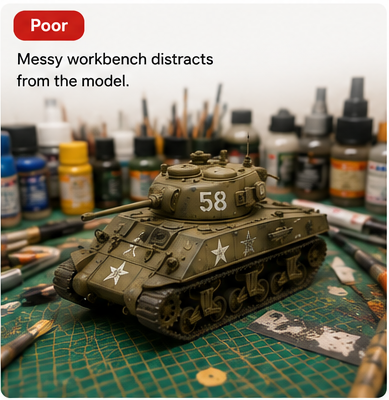
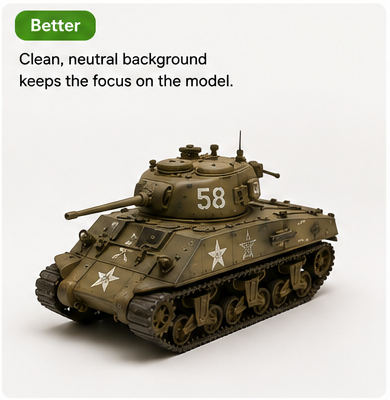
A simple background keeps attention where it belongs—on your model.
- White, light gray, dark gray, or black backgrounds usually work well.
- Poster board, seamless paper, foam core, or a purpose-built photo backdrop can work well.
- Remove paint bottles, tools, boxes, drinks, furniture, and unrelated clutter from the frame.
- If possible, curve the backdrop rather than creating a visible 90-degree wall/table seam.
- Choose a background that provides enough contrast with the model.
- Avoid highly reflective backgrounds unless the effect is deliberate.
3. Get the Camera Down to the Model
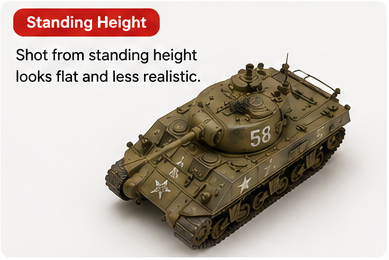
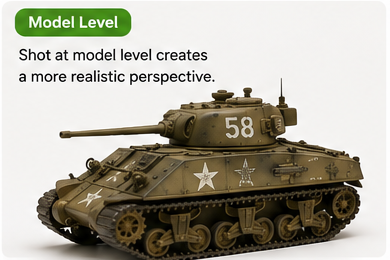
Photograph your model from its own point of view—not from standing height.
- Try eye-level or slightly below eye-level angles.
- Three-quarter views are often especially flattering and informative.
- Avoid making every photograph a steep top-down view.
- Overhead views are useful for showing specific details, not necessarily as the primary photograph.
- For armor, automotive, aircraft, and many sci-fi subjects, a lower perspective often makes the subject appear more realistic.
- Move yourself or the camera rather than relying heavily on digital zoom.
4. Focus and Depth of Field
Smartphone Tips
- Tap the model on screen to set focus.
- Avoid excessive digital zoom; move closer instead when practical.
- Hold the phone steady or use a small stand/tripod.
- Use a 3–10 second timer when touching the shutter causes movement.
- Clean the phone’s camera lens before photographing.
- Natural or additional lighting helps the phone focus and keep image noise down.
- Check the photograph at full size before packing everything away.
Camera Tips
- Use a smaller aperture / higher f-number when more of the model needs to remain in focus.
- Use a tripod for consistently sharp results.
- Keep ISO reasonably low when lighting allows.
- Use a remote shutter, self-timer, or equivalent when helpful.
- Focus deliberately on the primary subject area.
- Take multiple frames when depth of field is difficult.
5. Photograph the Details
A variety of angles helps showcase the work you put into your model.
A useful completed-build photo set includes several overall views plus close-up detail shots.

6. Simple Editing Is Fine
A little editing can improve your photos—just keep it natural.
Good Edits
- Crop and straighten
- Adjust exposure
- Correct white balance
- Improve contrast slightly
- Reduce unnecessary empty space
- Make minor corrections that help the image accurately represent the model
Avoid Overdoing It
- Excessive sharpening
- Heavy saturation
- Filters that significantly alter the real paint colors
- Artificial backgrounds that misrepresent the model
- Extreme HDR/effects
- Editing that hides flaws or materially changes the appearance of the build
The goal is to make the photograph accurately represent the model—not transform it into something it isn’t.
Quick Checklist
Before You Take the Picture
- Clean the model
- Clean the camera lens
- Remove clutter
- Use a neutral background
- Check lighting
- Focus on the model
- Get down to model level
- Take several angles
- Check the photos before putting everything away