Brush Painting Smooth, Clean Finishes
You Don’t Need an Airbrush to Get a Good Finish
A beautifully painted scale model doesn’t have to begin with an airbrush. With the right brush, well-prepared paint, and a little patience, you can produce an attractive, even finish using traditional hand-painting techniques.
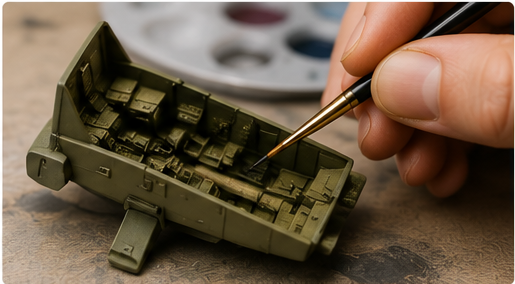
Brush painting is also a skill you’ll use throughout the hobby. Even modelers who spray their main colors rely on brushes for cockpits, road wheels, tools, interiors, touch-ups, and countless small details.
The challenge is that paint behaves differently under a brush than it does when sprayed. Too much paint leaves ridges and hides detail. Too little may drag across the surface. Going back over an area as it starts to dry can lift the coat you just applied.
Fortunately, these problems are usually preventable. Once you understand paint consistency, brush loading, stroke control, and drying time, brush painting becomes much more predictable.
What Makes a Brush-Painted Finish Look Smooth?
A smooth finish isn’t necessarily one with absolutely no visible brush texture under magnification. On a scale model, it means the paint looks even at normal viewing distance, respects the surface detail, and doesn’t show distracting ridges, blobs, or streaks.
Four things make the biggest difference:
- Surface preparation: Paint follows the contours of what’s underneath it. Dust, fingerprints, scratches, and rough primer can show through.
- Paint consistency: Paint needs to leave the brush easily without running into every panel line and corner.
- Brush control: The brush should spread paint gently and consistently rather than scrub it across the plastic.
- Drying time: The previous layer needs to be ready before you add another. Reworking partially dried acrylic paint is a common source of texture.
None of these requires expensive equipment. They require observation and a willingness to make a small test before painting the model itself.
Choose Paint That Suits Brush Painting
Not all model paints behave the same way. Some are formulated specifically for hand brushing, while others are optimized for airbrushing or have a shorter working time.
Water-Based Hobby Acrylics
Water-based acrylics intended for brush painting are a practical starting point. Many flow well from a soft brush, offer useful coverage, and can be cleaned from brushes with water while still wet.
Some colors are naturally less opaque than others. Bright yellow, red, and certain light colors may require more coats, particularly over a dark surface.
Use the thinner recommended for the specific paint. Water works for many water-based hobby acrylics, but not every paint sold as “acrylic” uses the same solvent system.
Alcohol-Based Acrylics and Other Fast-Drying Paints
Some hobby acrylic formulations dry or set relatively quickly, making them more challenging to brush over broad areas. They may benefit from a compatible manufacturer-approved retarder or other additive.
For example, Tamiya identifies a paint retarder intended to improve the brush-painted finish of its acrylic range. That does not mean the same additive belongs in every brand of paint.
Enamels
Many traditional hobby enamels can level well when brushed, but they generally require compatible solvent-based thinner and appropriate brush cleaner. Drying and curing characteristics differ from water-based acrylics.
Provide suitable ventilation, avoid unnecessary skin contact, and follow the product label and safety information.
Choose the Right Sheen
Matte and satin colors can be more forgiving of small surface imperfections. Gloss paint reflects light strongly, making brush texture and dust more noticeable.
If your goal is a mirror-smooth car-body finish, brushing may require specialized products and extra practice; spraying is often easier for that particular finish. For most general modeling subjects, however, carefully brushed colors can look excellent.
Use the Right Brush for the Area
A tiny brush isn’t automatically a better brush. In fact, using one on a large wing or tank hull can make smooth coverage much harder.
| Brush Type | Best For | What to Look For |
|---|---|---|
| Medium flat brush | Wings, hull sides, fuselages, large flat panels | Soft, even bristles and a clean, straight edge |
| Filbert or rounded-flat brush | Curved bodywork and transitions | A smooth rounded tip that doesn’t leave sharp stroke edges |
| Pointed round brush | Cockpits, wheels, tools, fittings, and general detail work | A reliable point and enough body to hold paint |
| Fine detail brush | Small instruments, handles, switches, and precise touch-ups | Good tip control rather than simply the smallest possible size |
Synthetic brushes can work very well with many modern acrylics. Natural-hair brushes are also used for particular products and techniques. Choose a brush suited to your paint and the area being covered.
Brush Size Matters
Use the largest practical brush for the surface you want to cover without losing control. A broader brush lays down more paint in fewer strokes, reducing the temptation to repeatedly work the same area.
A fine-point brush is better for detail work, but it can hold very little paint. That small amount may start to dry before you finish a large surface.
Keep Your Brushes in Good Condition
A brush clogged with dried paint or splayed bristles is more likely to leave marks. Clean brushes promptly with the product’s compatible cleaner, reshape the bristles gently, and allow them to dry appropriately.
Avoid leaving a brush standing on its tip in a cleaning jar. This can permanently deform the bristles.
Prepare the Surface Before You Open the Paint
Even perfectly applied paint won’t hide a dusty, scratched, or uneven surface.
Start by inspecting the model for seams, fingerprints, sanding residue, and glue marks. Correct obvious construction flaws and remove dust carefully.
A suitable primer can help paint adhere and create a uniform base, especially on mixed materials or surfaces that have been filled and sanded. Primer isn’t mandatory for every paint system, but it is often useful.
If you have primed the model, let the primer cure for the time specified by its manufacturer. A surface that feels dry may not yet be ready for handling, sanding, or another coating.
Organize Your Work
Mount the model or subassembly on a holder whenever possible. That way, you can rotate it without touching fresh paint.
Make sure the workspace has good light, a clean palette, suitable thinner or water, and a place to set down the brush safely.
Paint hard-to-reach interiors and small parts before final assembly when appropriate, but leave bonding areas clean if they will require plastic cement or another adhesive.
Get the Paint Consistency Right
This is one of the most important parts of brush painting - and one of the hardest to reduce to a single formula.
You’ll often hear the advice to “thin your paint.” That’s useful, but it doesn’t mean every bottle needs the same amount of thinner.
The correct consistency depends on the brand, pigment, color, surface, brush, and the effect you’re trying to create.
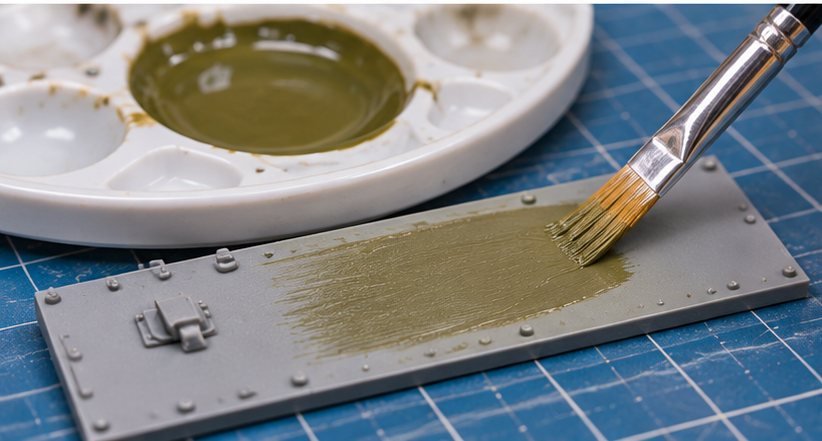
The Palette Test
- Shake or stir the paint as directed so the pigment is evenly mixed.
- Put a small amount on a separate palette rather than painting directly from the jar.
- Add a small amount of compatible thinner only if the paint needs it.
- Mix thoroughly and load a little paint onto your brush.
- Make a test stroke on spare primed plastic or an unused piece of sprue.
A useful mix should spread with little resistance, settle into a reasonably even film, and stay where you put it without flooding recesses.
If the brush drags and leaves thick ridges, the paint may be too viscous or drying too quickly. If the paint runs uncontrollably, beads up, or becomes very transparent, it may be over-thinned or the surface may be contaminated.
What About a Wet Palette?
A wet palette can help keep many water-based acrylic paints workable during a longer session. It is especially helpful for small batches of color and detail painting.
Use it as directed for compatible paints, and monitor how much moisture reaches the paint. Too much water can change the consistency unexpectedly.
Do not use an ordinary water-based wet palette with solvent-based enamels or lacquer paints.
Thinner, Flow Improver, and Retarder Aren’t Interchangeable
- Thinner adjusts the paint’s viscosity when the product permits it.
- Flow improver can change how some water-based paints spread or wet the surface.
- Retarder slows drying in compatible formulations, giving the paint more time to level.
These products are not universal. Use only compatible additives, in the manufacturer’s recommended amounts. Too much additive can create other problems, including slow curing or reduced performance.
Load the Brush Without Flooding the Model
A properly mixed paint can still leave a rough finish if there’s too much of it on the brush.
Dip the bristles into the prepared paint and gently remove the excess against the palette. You want enough paint to make a controlled stroke, not a droplet hanging from the tip.
Try to keep paint out of the metal ferrule at the base of the bristles. Dried paint there can make the brush spread and lose its shape.
Before the First Stroke
- Hold the brush at a comfortable, fairly shallow angle to the surface.
- Use light pressure so the bristles flex gently rather than flattening completely.
- Start on an area where you can keep the stroke moving steadily.
- Work on one manageable section rather than the whole model at once.
If the brush stops releasing paint smoothly, reload it. Don’t force dry bristles over the model to stretch one brushful as far as possible.
Step by Step: Brush-Painting a Large Surface
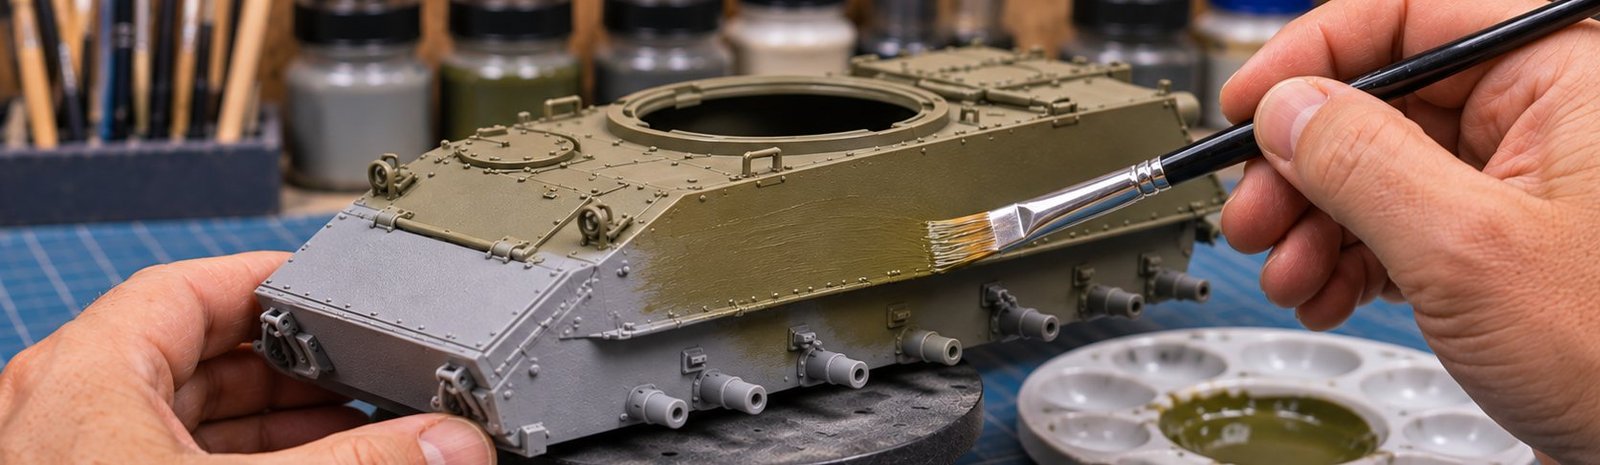
For our example, imagine applying olive-drab paint to the broad side of a 1/35 armored vehicle or the wing of an aircraft.
Step 1 - Work in Manageable Sections
Choose a panel or area you can cover comfortably before the paint starts to set. Use panel boundaries and natural breaks in the model’s shape when possible.
Step 2 - Place the Paint Gently
Start the stroke with a lightly loaded flat brush. Draw it along the surface in one smooth movement, allowing the bristles to distribute the paint.
Avoid pressing hard, scrubbing, or repeatedly dabbing at the same spot.
Step 3 - Overlap While the Paint Is Still Workable
Make a neighboring stroke with a slight overlap so you don’t leave narrow unpainted strips. If the paint is still wet, gently blend the boundary with a light pass.
The goal is to maintain a consistent edge of workable paint without overloading the surface.
Step 4 - Watch for Pools and Ridges
Check corners, raised details, and panel lines. If paint is gathering there, reduce the amount you’re applying.
A thin first coat may look slightly patchy. That’s normal.
Step 5 - Stop Before the Paint Starts to Set
As soon as the coat begins to lose its wet appearance or resist the brush, stop working that area. Trying to perfect it at this point is one of the easiest ways to lift paint and create texture.
Step 6 - Let the Coat Dry as Directed
Give the paint the recoat time recommended by its manufacturer. Don’t judge readiness by the surface feeling dry for a few seconds.
Step 7 - Add Another Thin Coat if Needed
Build the color gradually. On some broad areas, changing your stroke direction between fully dried coats can help reduce the visibility of lines, provided the underlying layer is sound and the paint behaves well with that technique.
Keep going only until the coverage is even enough for the desired finish. More layers are not always better.
How Many Coats Do You Need?
There’s no universal answer. An opaque dark gray may cover quickly, while a bright yellow over dark primer can take considerably more work.
Expect a first coat to look imperfect at times. What matters is whether it is thin and reasonably even, not whether it completely hides the surface underneath.
Look for These Signs of Good Coverage
- Color is consistent when viewed at normal distance.
- Panel lines and surface details remain visible.
- There are no heavy ridges where strokes overlap.
- The paint doesn’t form puddles around raised features.
- The finish is fully ready for the next step before handling or masking.
If you’re on your third or fourth coat and the surface still looks streaky, stop and diagnose the issue. More paint won’t fix a contaminated surface, poorly mixed pigment, or a brush that keeps dragging through partially dry coats.
Drying Versus Curing
Paint may feel dry to the touch before it has fully hardened. The distinction matters when adding tape, decals, clear coats, or other finishes.
Follow the product’s instructions for recoating and curing. Temperature, humidity, coat thickness, and additives can all affect how long the process takes.
Painting Details Without Messy Edges
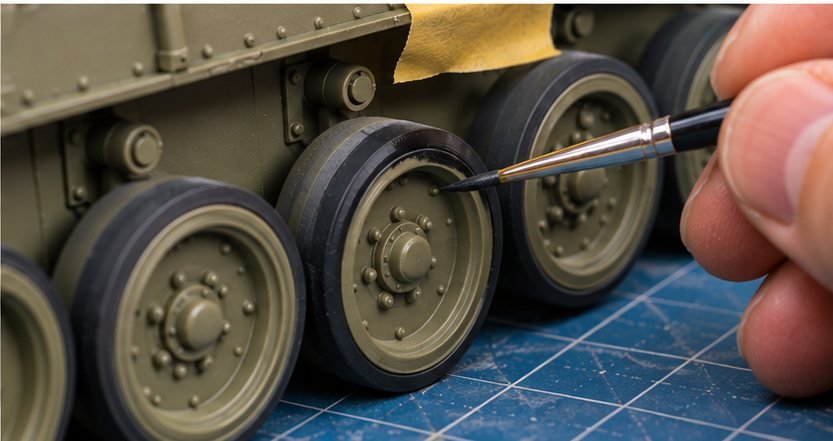
Brush painting becomes especially rewarding when you turn from broad surfaces to small parts. A pointed round brush lets you pick out tires, tools, instrument panels, handles, and other details without covering the surrounding color.
Use the Tip - and Sometimes the Side
Use the tip of a good brush for small lines and dots. For a raised edge or rim, the side of the brush may give you more consistent contact.
Load very little paint and support your hands against the workbench where possible. Rotate the model instead of forcing your wrist into an awkward position.
Paint in a Sensible Order
For a military vehicle, it may be easier to paint the main hull color first, then the road-wheel rubber, and finally small tools and fittings.
For an aircraft cockpit, paint the larger interior areas before picking out switches, seat details, and instrument faces.
Clean Up Small Mistakes
If you touch a neighboring area, don’t immediately rub it with a finger or wet brush. Allow the paint to dry as appropriate, then touch up carefully with the original color.
When the finish is cured, a steady hand and a controlled brush can correct many small mistakes without starting over.
Special Challenges: White, Yellow, Metallics, and Gloss
Some finishes are less forgiving than others. The solution is usually to adjust the plan, not simply apply thicker paint.
White and Yellow
These colors can require a light, uniform undercoat and several thin layers. Avoid trying to obtain full opacity in one heavy pass.
Metallic Colors
Metallic pigments can settle quickly and sometimes show inconsistent brush direction. Mix thoroughly, use a compatible base coat if recommended, and test the finish on spare plastic.
Gloss Finishes
Gloss paint highlights surface texture and dust because reflections are easier to see. Use the smoothest practical surface, a brush-friendly product with suitable leveling properties, and careful drying conditions.
A compatible clear coat can adjust sheen, but it won’t reliably hide deep brush ridges or heavy paint buildup.
Matte Finishes
Matte paint is generally more forgiving of slight texture, but heavy coats can still obscure detail. Thin, controlled layers remain the better approach.
Common Brush-Painting Problems and How to Fix Them
Most brush-painting problems have a practical cause. Fixing that cause is more effective than continuing to add paint.
| Problem | Possible Cause | What to Do |
|---|---|---|
| Visible brush ridges | Paint too thick, too much paint on the brush, stiff bristles, or excessive pressure | Test a better consistency, use a softer suitable brush, and apply lighter strokes |
| Patchy or streaky coverage | First coat not fully covering, poorly mixed paint, or inconsistent application | Allow the coat to dry, remix the paint, and add another thin, controlled layer |
| Paint lifting as you brush | Reworking partially dried paint or poor adhesion | Stop brushing, allow full drying, then repair only after checking the surface |
| Paint pooling around details | Overloaded brush or paint that is too thin | Remove excess while safely workable and reduce the amount on the brush |
| Paint beading on plastic | Fingerprints, grease, contamination, or a paint/surface mismatch | Clean and prepare a test area; use compatible primer if needed |
| Tiny bubbles or a foamy surface | Overmixing, scrubbing with the brush, or an unsuitable additive/technique | Let paint settle, avoid aggressive brush movement, and test without excess additives |
| Rough, dusty finish | Contamination, dried paint on bristles, or unsuitable working conditions | Clean the workspace and brush; repair the cured surface if the paint permits |
| Brush hairs trapped in paint | Damaged or low-quality brush shedding bristles | Replace the brush and remove debris carefully after the coating is ready |
| Soft or sticky paint | Incomplete curing, heavy layers, or incompatible additive/thinner | Allow more time, consult the label, and avoid coating over persistent tackiness |
Before You Try to Fix It
If the paint is already setting, stop. Let the surface dry or cure as appropriate before attempting a repair. Rubbing a half-dry coating often turns a small imperfection into a larger one.
When safe for the paint system, a fully cured ridge may sometimes be smoothed carefully before touch-up painting. Don’t assume every acrylic coating sands well: some can peel or roll instead.
Five Habits That Make Every Painting Session Easier
1. Test before committing. A spare primed part is the best place to try an unfamiliar color or thinner.
2. Work with enough light. Position a lamp so you can see wet areas, overlap marks, and missed details without casting a large shadow over your work.
3. Keep a clean palette and brush. Dried flakes from old paint can end up in the finish.
4. Take short breaks. If you notice yourself repeatedly touching an area to make it “perfect,” it’s probably time to let that coat dry.
5. Practice on one surface at a time. A wing, road wheel, turret side, or spare plastic panel is enough to teach you how a paint behaves.
Progress comes from repeating a good technique, not from buying every painting accessory at once.
Frequently Asked Questions
Can you really paint an entire scale model with a brush?
Yes. Many modelers do. A brush is particularly effective for smaller subjects, interiors, and detail work. Large smooth surfaces can take more practice, but careful preparation and multiple controlled coats can produce attractive results.
How much should I thin my acrylic paint?
There isn’t a universal ratio. Some brush-friendly paints need little or no thinning; others benefit from a small amount of compatible thinner. Use the manufacturer’s guidance and judge the result on a test piece.
Should I paint in one direction?
Smooth, consistent strokes are helpful. On large areas, some modelers alternate direction between fully dried coats to reduce visible lines. The more important rule is not to overwork paint while it is drying.
Why does my first coat look so bad?
A thin first coat may look transparent or uneven because it hasn’t built sufficient coverage yet. That alone doesn’t mean anything is wrong. Allow it to dry and judge the finish after the next controlled coat.
Is a wet palette required?
No. A simple clean palette works well. A wet palette can be convenient for compatible water-based acrylics because it reduces drying on the palette, but it is optional.
Will paint retarder eliminate brush marks?
Not automatically. A compatible retarder may give certain paints more working time, but brush choice, paint loading, surface preparation, and technique still matter. Follow the manufacturer’s instructions and avoid excessive additives.
Do I need to sand between every coat?
No. Sanding isn’t necessary when the paint is already smooth. Unnecessary sanding can damage details or lift a fragile coating. Correct problem areas only when the product is sufficiently cured and suitable for the method.
Can I brush-paint over primer applied with an airbrush or spray can?
Usually, yes, if the primer and topcoat are compatible and the primer has cured as instructed. Test any unfamiliar paint combination first.
What if I’m trying to paint a glossy car body?
You can experiment with brush-friendly gloss products, but a flawless high-gloss finish on a large body shell is demanding. A spray can or airbrush is often an easier route to that particular effect. There’s no need to master it on your first brush-painted project.
Your Smooth Brush-Painting Checklist
Before moving on to decals, weathering, or clear coats, ask yourself:
- Is the surface clean, prepared, and ready for paint?
- Am I using a paint formulated or suitable for brushing?
- Have I chosen an appropriate brush for the surface?
- Is the paint mixed and, if necessary, thinned with a compatible product?
- Have I tested the consistency on spare plastic?
- Have I removed excess paint from the brush?
- Have I used light, controlled strokes instead of scrubbing?
- Did I stop working each coat once it began to set?
- Have I allowed the required drying or curing time?
- Are panel lines and small details still visible?
- Have I corrected any obvious ridges, pools, or missed spots?
- Are my brushes cleaned and stored properly?
If you can check these off, you’re developing the habits that lead to cleaner and more consistent paint finishes.
Final Thoughts: Let the Brush Do the Work
Brush painting is more than a budget alternative to airbrushing. It’s a fundamental modeling skill that gives you control over both broad areas and the smallest details.
The most reliable results come from a prepared surface, a brush that fits the job, paint that flows correctly, and the discipline to let each coat dry before adding another.
Don’t judge your progress by a single imperfect first coat. Judge it by how much more confidently you handle the brush on your next model.
Happy modeling!
— Duneland Model Club