Painting Your First Scale Model
From Bare Plastic to Your First Finished Model
You’ve assembled your first scale model, cleaned up the seams, and carefully fitted the parts together. Now comes one of the most rewarding stages of the hobby: painting.
It’s also the stage that can make new modelers a little nervous.
What kind of paint should you use? Do you need an airbrush? How do you avoid brush marks? Should you paint everything before assembly or wait until the model is finished?
Fortunately, you don’t need expensive equipment or years of experience to achieve an attractive paint job.
A few basic tools, the right materials, and a little patience can produce excellent results.
More importantly, your first model doesn’t have to be perfect. Every painting session teaches you something that will make your next project better.
In this guide, we’ll walk through the entire basic painting process, from choosing your paint and preparing the surface to applying colors, painting details, and protecting the finished model.
Start With a Simple Painting Plan
Before opening your first bottle of paint, take a few minutes to decide what you want your finished model to look like.
Most scale-model kits include suggested paint colors in their instructions. These may be identified by descriptive names, manufacturer’s paint numbers, or historical color references.
For your first project, the instruction sheet is usually a good place to start.
Keep Your First Color Scheme Manageable
An elaborate camouflage pattern or highly polished automotive finish can be challenging when you’re still learning basic painting techniques.
Instead, consider a simpler scheme.
Good beginner examples include:
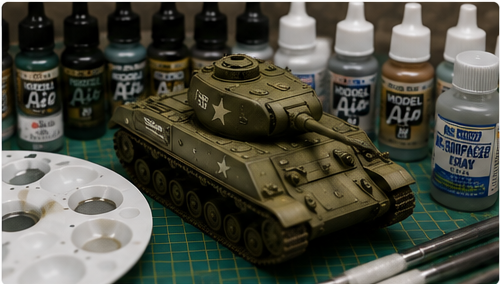
- A military vehicle with a single olive-drab or desert-tan base color.
- An aircraft with one upper-surface color and a different underside color.
- A ship with a relatively straightforward hull and deck color arrangement.
- A civilian vehicle with a solid exterior color.
- A science-fiction model with a limited selection of complementary colors.
You can always attempt more complicated finishes on future builds.
Identify Your Main Colors
Before painting, identify three basic categories:
Main colors: The colors covering the largest surfaces, such as the body of a vehicle, aircraft fuselage, or ship’s hull.
Secondary colors: Smaller areas that use a different color, such as an aircraft’s underside, a vehicle’s interior, or a contrasting camouflage section.
Detail colors: Colors for tires, tracks, tools, exhausts, instrument panels, seats, and other small components.
Organizing your colors this way makes the painting process easier to manage.
Gather Your Basic Painting Supplies
One of the best things about scale modeling is that you can begin painting without buying an airbrush or an extensive collection of equipment.
A few quality brushes and appropriate hobby paints are enough for many beginner projects.
Essential Painting Supplies
| Item | Purpose |
|---|---|
| Hobby model paints | Provide the colors and finishes for your model |
| Medium flat brush | Useful for painting larger, relatively flat surfaces |
| Small round brush | Provides control for smaller components and detailed areas |
| Fine-point brush | Helpful for instruments, handles, and other tiny details |
| Paint palette | Allows you to mix and thin paint without contaminating the bottle |
| Appropriate thinner | Adjusts paint consistency when required |
| Cleaning supplies | Keeps brushes and tools in good condition |
| Masking tape | Protects areas that should not receive a particular color |
| Model holder or stand | Lets you paint without constantly touching the model |
| Good lighting | Makes coverage problems and missed details easier to see |
You may already have some of these supplies from assembling your model.
A self-healing cutting mat, a few paper towels, and a small container for cleaning brushes are also useful.
Do You Need Expensive Brushes?
No.
For your first model, a small selection of decent-quality hobby brushes is more useful than a large set of inexpensive brushes that shed bristles or lose their shape.
A flat brush is particularly helpful when painting large surfaces, while a pointed round brush provides better control around small details.
Choose brushes that maintain their shape and feel comfortable in your hand.
Understanding the Different Types of Model Paint
Walk into a hobby shop and you’ll find several types of paint.
The choices may seem confusing initially, especially because different manufacturers use different formulations and naming conventions.
The three broad categories you’ll encounter most often are acrylic, enamel, and lacquer.
Acrylic Paints
Acrylic paints are widely used throughout the scale-modeling hobby.
Many water-based acrylic modeling paints are particularly convenient for beginners because they can be brush-applied and cleaned up using water while the paint is still wet.
Depending on the formulation, some can also be thinned with water or a compatible acrylic thinner.
However, not all acrylic hobby paints use the same solvent system. Products labeled acrylic may require their manufacturer’s specific thinner, especially when airbrushing.
Water-based acrylics generally have less solvent odor than lacquer paints, but appropriate handling and ventilation remain important.
For beginners who plan to use paintbrushes, a hobby acrylic range specifically formulated for brush painting is often an excellent choice.
Enamel Paints
Enamel paints have a long history in scale modeling.
Many hobby enamel paints offer good coverage and a smooth finish. They can be particularly useful for detail painting and certain finishing techniques.
However, conventional solvent-based enamels typically require compatible enamel thinners and cleaning products.
They may also need longer drying or curing periods than some acrylic formulations.
Follow the manufacturer’s recommendations regarding application, ventilation, and compatibility.
Lacquer Paints
Lacquer paints are popular for their application properties and the smooth, durable finishes many formulations can produce.
They’re frequently used by modelers who airbrush aircraft, military vehicles, and automotive subjects.
However, lacquer paints generally involve stronger solvents and require additional precautions.
They may damage incompatible underlying paints or sensitive plastic if applied incorrectly.
For someone painting their very first model, lacquer paints aren’t necessary.
You can explore them later if your preferred subjects and painting techniques make them worthwhile.
What About Gloss, Satin, and Matte?
Paints are also available in different finishes.
Gloss: A shiny, reflective finish. Commonly used for polished automobiles and certain other subjects.
Satin or semi-gloss: A finish with some sheen but less reflection than gloss.
Matte or flat: A low-reflection finish commonly used for military vehicles, aircraft camouflage, and many other subjects.
The correct finish depends on what you’re modeling.
A military truck and a freshly polished sports car probably shouldn’t have the same surface sheen.
Choosing Your Painting Method
There are three common ways to apply the main colors to a scale model.
Each has advantages, and all can produce good results when used properly.
| Method | Advantages | Considerations |
|---|---|---|
| Paintbrush | Affordable, simple equipment, excellent for detail work | Larger surfaces require careful technique to avoid visible brush marks |
| Spray can | Convenient coverage of larger areas, no airbrush required | Less precise control, potential overspray, and significant ventilation requirements |
| Airbrush | Excellent control of coverage, paint flow, and detailed patterns | Higher initial cost, additional equipment, cleaning, and spray-safety requirements |
Which Method Should You Choose?
If you’re painting your first model, don’t feel pressured to purchase an airbrush.
A paintbrush is a perfectly reasonable way to begin.
You’ll learn valuable skills such as controlling paint consistency, applying thin layers, working around details, and identifying areas that need additional coverage.
Even experienced airbrush users regularly paint small details with traditional brushes.
Spray cans and airbrushes are useful tools, but neither is a requirement for enjoying the hobby.
A Note About Painting Safety
Painting products can expose you to airborne particles, solvents, or other chemicals.
When spraying, use equipment and ventilation suitable for the particular product. Follow the label and safety information, including requirements for respiratory protection and flammability precautions.
A basic dust mask does not protect against solvent vapors, and an ordinary hobby spray booth should not be assumed safe for flammable products.
Even when brush painting, keep your workspace appropriately ventilated and avoid eating or drinking around paints and solvents.
Prepare the Model Before Painting
A successful paint job begins with a clean, properly prepared surface.
If you’ve already followed our guide, Primer: Why It Matters and How to Use It, you’ll be familiar with many of these steps.
Inspect the Assembly
Look carefully for:
- Visible seams between joined parts.
- Mold lines that weren’t completely removed.
- Glue marks or excess adhesive.
- Scratches left from sanding.
- Small gaps that need filler.
- Loose parts that may interfere with painting.
Correct visible problems before proceeding.
Painting will often make construction flaws more noticeable rather than hiding them.
Clean the Surface
Fingerprints, dust, sanding residue, and other contaminants can interfere with paint adhesion.
For suitable unpainted plastic parts, gently cleaning with mild dish soap and water can help remove surface contamination.
Rinse as appropriate and allow everything to dry completely.
Use care around fragile assemblies, existing paint, and materials that could be damaged by washing.
Avoid strong cleaning solvents unless they’re specifically known to be safe for the materials involved.
Decide Whether to Paint in Subassemblies
Not every model needs to be completely assembled before painting.
For example, it may be easier to paint an aircraft cockpit before closing the fuselage or a vehicle’s interior before attaching the roof.
Other parts may be easier to paint separately:
- Aircraft landing gear.
- Road wheels and tracks.
- Vehicle interiors.
- Cockpit components.
- Exhaust assemblies.
- Small accessories.
However, avoid painting bare plastic surfaces that still need to be bonded with solvent-type plastic cement.
Paint can interfere with proper adhesion.
Should You Apply Primer First?
For many first-time painters, primer is a worthwhile step.
A suitable primer can improve paint adhesion, create a consistent foundation, and help reveal small construction defects.
This can be particularly helpful if you’re using water-based acrylic paints over smooth plastic or if the model includes putty, metal, or resin components.
However, not every model or paint system requires a separate primer.
Follow the recommendations for your paint and surface materials.
For a typical beginner project, a quality gray hobby primer is a versatile starting point.
Apply it in thin coats, allow it to cure as directed, and inspect the surface before continuing.
Plan the Order of Your Painting
Painting a model becomes much easier when you work in a logical sequence.
Trying to paint everything randomly can leave you struggling to reach small areas or accidentally damaging work you’ve already completed.
A typical painting sequence might look like this:
- Paint difficult-to-reach interior areas. Cockpits, vehicle interiors, and similar components are often painted before final assembly.
- Finish major assembly and surface preparation. Correct seams, clean the model, and apply primer where appropriate.
- Apply the main exterior color. Begin with the largest areas.
- Add secondary colors. Paint undersides, contrasting panels, camouflage sections, or other large color changes.
- Paint smaller details. Work on wheels, tools, seats, exhausts, tracks, and similar components.
- Add markings and decals. Apply these once the relevant underlying finish is ready.
- Apply any compatible protective or finishing coats. Use these where needed to achieve the desired sheen or protect the finished paint.
This isn’t a rigid rule for every model. Some assemblies and finishes require a different order.
The important thing is to think ahead.
Example: Painting a Simple Military Vehicle
Imagine you’re building a 1/35-scale armored vehicle with a single green exterior color.
You could apply green to the main body, paint the tires and rubber wheel areas a dark gray, add metallic or appropriate dark colors to selected tools and mechanical details, and then apply the vehicle’s markings.
That relatively simple process can produce a finished model without requiring advanced camouflage or weathering techniques.
The Secret to Smooth Paint: Thin, Controlled Coats
One of the biggest mistakes new modelers make is applying paint too heavily.
It may seem logical that a thick coat will cover the plastic faster.
Unfortunately, excessive paint can create brush marks, runs, uneven texture, and buildup around delicate surface details.
The better approach is to apply controlled coats and gradually build coverage.
Why Thin Coats Work Better
Thin coats give you greater control over the amount of paint on the model.
They also make it easier to avoid filling panel lines or obscuring rivets and other molded details.
Some colors may require several coats to achieve good coverage.
That’s normal.
A slightly transparent first coat is often preferable to a thick coat that leaves a rough finish.
How Much Should You Thin Your Paint?
There is no universal thinning ratio that works for every paint.
Different brands, colors, formulations, and application methods can require different treatment.
Some brush-painting acrylics work well straight from the bottle. Others benefit from a small amount of compatible thinner.
Start by reading the manufacturer’s instructions.
If thinning is appropriate:
- Transfer a small amount of paint to a palette.
- Add a little compatible thinner.
- Mix thoroughly.
- Test the paint on a spare part or piece of plastic.
- Adjust the consistency if necessary.
The paint should flow smoothly from the brush without forming heavy ridges or uncontrolled puddles.
If it beads up, runs excessively, or fails to cover after repeated coats, the paint may be too thin, the surface may be contaminated, or the products may be incompatible.
If it drags, leaves prominent ridges, or dries before it can level, the paint may be too thick or drying too quickly for the way you’re applying it.
How to Paint Your Model With a Brush
Brush painting is where many modelers begin.
It requires relatively little equipment, and it teaches useful paint-control skills that remain valuable even if you eventually switch to an airbrush.
Step 1 — Prepare Your Paint
Stir or shake your paint according to the manufacturer’s instructions.
Make sure the pigment is evenly mixed.
Place a small amount on your palette and thin it if required.
It’s better to prepare a little paint at a time than to leave a large quantity exposed and drying while you work.
Step 2 — Choose the Right Brush
For larger surfaces, use a medium or appropriately sized flat brush.
A small pointed brush is better suited to details and confined areas.
Avoid using an extremely small brush for large areas. It can make consistent coverage unnecessarily difficult.
Step 3 — Load the Brush Correctly
Dip the bristles into the prepared paint without overloading the brush.
Remove excess paint against the palette.
You want enough paint for a smooth, controlled stroke without creating a large droplet at the brush tip.
Step 4 — Apply Smooth, Even Strokes
Begin painting one manageable section of the model.
On broad, relatively flat surfaces, use smooth strokes in a consistent direction.
Allow the brush to distribute the paint naturally.
Avoid pressing so hard that the bristles spread excessively or scrape against the model.
Don’t worry if the first coat looks slightly uneven.
Step 5 — Don’t Keep Brushing Paint That’s Starting to Dry
This is especially important with faster-drying acrylic paints.
Repeatedly brushing over an area that has begun to set can lift the partially dried coating, leaving ridges, streaks, or rough patches.
Once you’ve applied a reasonable coat, leave it alone.
If it needs more coverage, return after the paint is sufficiently dry.
Step 6 — Build Coverage Gradually
Allow the first coat to dry according to the manufacturer’s instructions.
Apply another thin coat if needed.
Continue until you have the desired coverage.
The number of coats depends on the paint, primer color, and surface being covered.
For example, yellow may require more careful layering than an opaque dark gray.
Step 7 — Inspect the Finish
Once the paint has dried, examine the model under good lighting.
Look for missed spots, visible ridges, excessive buildup, or inconsistent coverage.
Minor imperfections can often be corrected with additional careful painting.
For paint products suitable for sanding, a fully cured rough area may sometimes be gently smoothed before repainting.
Always check product compatibility before sanding or applying another coat.
What If You Can See Brush Marks?
Don’t immediately add more paint.
Visible brush marks can result from several factors, including paint consistency, brush selection, overly heavy application, and repeated brushing of paint that’s beginning to dry.
Review your technique and test a thinner, more controlled coat on a spare part.
A smooth brush-painted finish usually develops through practice rather than a single trick.
Painting With Spray Cans or an Airbrush
Once you’re comfortable with the basics, you may want to try spraying the main colors of your models.
Both methods can provide excellent coverage, particularly on larger surfaces.
Method A: Using a Hobby Spray Can
A hobby spray can is a convenient way to apply large areas of paint.
Choose a product specifically suitable for your model’s materials.
Before spraying:
- Read the product instructions and safety warnings.
- Confirm that your spray area and ventilation are appropriate.
- Protect areas that should remain unpainted.
- Mount the model securely.
- Shake or prepare the can as directed.
- Make a test spray before approaching the model.
Keep the can moving and use light, overlapping passes.
Begin spraying before the spray pattern reaches the model and stop after moving past it.
Avoid holding the can stationary over one area.
A few controlled passes are generally better than a heavy, wet application.
Use the spray distance, recoat times, and environmental conditions recommended for your particular paint.
Method B: Using an Airbrush
An airbrush uses compressed air to atomize paint into a fine spray.
It provides greater control over the paint pattern and application rate than many spray cans.
Airbrushes are particularly useful for:
- Painting large, relatively smooth surfaces.
- Applying thin base coats.
- Creating camouflage patterns.
- Painting small areas with controlled spray patterns.
- Building subtle color variations.
For your first airbrushing session:
- Select compatible paint. Use paint intended for airbrushing, or follow the manufacturer’s instructions for preparing a brush-oriented paint.
- Prepare the mixture. Thin only when required and use a compatible thinner.
- Test the spray. Practice on spare plastic or another suitable test surface.
- Adjust your equipment. Use the pressure and nozzle recommendations appropriate to the paint and airbrush.
- Apply thin passes. Keep the airbrush moving and build coverage gradually.
- Clean your airbrush. Follow the manufacturer’s cleaning procedure after painting.
Spraying requires appropriate ventilation and protection against airborne paint particles and any relevant solvent vapors.
Don’t assume that a paint is safe to spray simply because it is labeled water-based.
Painting Multiple Colors and Using Masking Tape
After applying your main color, you may need to paint a second color.
This is where masking tape becomes especially useful.
Masking protects the areas you’ve already painted and helps create clean boundaries between colors.
Step 1 — Let the First Color Cure
Don’t rush into masking freshly applied paint.
A coating can feel dry before it has developed sufficient adhesion and hardness to tolerate tape.
Follow the manufacturer’s recommended curing time.
Step 2 — Use Suitable Hobby Masking Tape
Choose low-tack masking tape designed for delicate hobby finishes.
Ordinary household tape may adhere too aggressively or leave residue.
Cut the tape to fit the shape of the area you’re protecting.
For curved camouflage patterns or complex shapes, flexible modeling tape or carefully cut masking shapes may be helpful.
Step 3 — Seal the Edges Gently
Press the tape edges down carefully with an appropriate tool, such as a clean cotton swab.
The goal is to prevent paint from flowing underneath the mask without damaging the existing finish.
Avoid dragging sharp tools across painted surfaces.
Step 4 — Apply the Second Color
Paint the exposed area using controlled coats.
Avoid flooding paint against the tape edge.
If spraying, use light applications rather than forcing a heavy, wet coat toward the masked boundary.
Step 5 — Remove the Mask Carefully
Follow the paint manufacturer’s guidance on when the coating can safely be unmasked.
Gently peel the tape away, watching for lifting paint or a thick paint ridge along the edge.
If you notice any problems, stop and address them before continuing.
What If Paint Leaks Under the Tape?
Small mistakes are common.
Allow the affected paint to dry sufficiently, then carefully correct the edge using a suitable fine brush and the original color.
Don’t try to scrub wet paint away aggressively, as doing so can damage the surrounding finish.
Painting Small Details
Once the main colors are complete, it’s time to bring the smaller parts of your model to life.
Detail painting can make a surprisingly large difference to the overall appearance of a finished model.
Small areas of contrasting color help define individual components and make them easier to recognize.
Start With the Most Visible Details
Depending on your subject, these might include:
Aircraft
- Propellers and spinner details.
- Landing gear and wheel tires.
- Cockpit components.
- Exhausts.
- Interior canopy framing, where appropriate.
Military Vehicles
- Tires and road-wheel rubber.
- Tracks.
- Tools and equipment.
- Exhaust components.
- Headlights and other fittings.
Automobiles
- Interior seats and dashboards.
- Tires and wheel details.
- Headlights and taillights.
- Trim and engine components.
Ships
- Deck fittings.
- Lifeboats.
- Guns and turrets.
- Railings and other small components.
Use a Fine Brush—but Not Necessarily the Smallest Brush
A good detail brush should have a reliable point and hold an appropriate amount of paint.
Extremely tiny brushes can dry out quickly and may be harder to control than slightly larger brushes with good tips.
Rest your hands or wrists against the workbench when possible.
Using a model holder also helps keep the subject steady.
Work Slowly Around Raised Details
Load the brush lightly and approach the part from a comfortable angle.
Use the side of the brush for certain raised details and the tip for small recessed areas or edges.
Don’t attempt to paint every tiny component in one continuous stroke.
Take your time and let one area dry before handling nearby parts.
Keep Colors Appropriate to the Subject
Not every metallic component should be painted bright silver.
For example, exhaust systems, tools, tracks, and mechanical components can have very different appearances depending on their material and condition.
Reference photographs can help you choose convincing colors.
On a first model, accurate basic colors and careful application often matter more than elaborate weathering.
Adding Decals, Weathering, and a Final Finish
Once the main colors and details are complete, your model may already look very good.
There are a few optional finishing steps that can improve its presentation further.
Decals and Markings
Many model kits include waterslide decals for identification numbers, insignia, logos, and other markings.
Apply decals according to the kit and decal-product instructions.
A smooth gloss surface or suitable gloss clear coat is often helpful because it can reduce the appearance of trapped air beneath the decal film.
This is particularly useful when applying decals over matte paint.
Allow the underlying paint or clear coat to cure as required before applying decals.
After the decals have dried, compatible decal-setting or softening products may help them conform to surface details.
Test unfamiliar products first, particularly on delicate finishes.
Do You Need to Weather Your First Model?
No.
Weathering involves techniques that simulate use, age, dirt, fading, rust, exhaust stains, and other surface effects.
These can make a model appear more realistic, but they are not essential for a successful first paint job.
If you’d like to try a basic effect, consider a small amount of drybrushing or a compatible wash on a suitable test piece before applying it to your model.
Be particularly careful when applying solvent-based washes over acrylic paint.
The compatibility and curing requirements of the underlying finish matter.
Should You Apply a Clear Coat?
A clear coat can help establish the final sheen and, with compatible products, provide some protection for the paint and decals.
Common finishes include:
- Gloss: For shiny surfaces and polished subjects.
- Satin: For a moderate, realistic sheen.
- Matte: For a low-reflection finish.
Not every model requires a final clear coat, and a clear coat is not guaranteed to prevent scratching or handling damage.
Use a product compatible with your underlying paint and decals.
Apply it according to the manufacturer’s instructions, and avoid coating transparent areas that must remain clear unless you’re using a product specifically intended for them.
Common Painting Problems and How to Fix Them
Every modeler occasionally encounters painting problems.
Learning how to identify the cause is more useful than trying to fix every mistake by immediately adding another coat of paint.
| Problem | Possible Cause | What to Do |
|---|---|---|
| Visible brush marks | Paint too thick, unsuitable brush, or repeated brushing of drying paint | Adjust the paint consistency, use a suitable brush, and apply more controlled coats |
| Uneven or patchy coverage | Insufficient coverage, poorly mixed paint, or an unsuitable base color | Mix the paint thoroughly and build coverage gradually with additional thin coats |
| Paint running or pooling | Too much paint applied at once | Remove excess while workable if safe to do so; otherwise allow it to dry and correct the area |
| Paint peeling or lifting | Poor surface preparation, incompatible coatings, or insufficient curing | Remove loose paint, prepare the surface properly, and repaint with compatible products |
| Rough or grainy finish | Poor spraying technique, dried overspray, or unsuitable paint consistency | Review application conditions and settings; smooth the surface only if the coating permits |
| Paint bleeding under masking tape | Poor tape adhesion or heavy paint buildup against the edge | Correct the edge after drying and use better masking technique on future coats |
| Details disappearing | Excessively thick paint layers | Stop adding paint; carefully correct or remove heavy buildup where necessary |
| Sticky or soft paint | Incomplete curing, excessive thickness, or incompatible products | Allow additional curing time and check product instructions before applying more paint |
| Dust or debris in the finish | Contaminated workspace, brushes, or model surface | Keep the area clean and remove defects only after the coating has sufficiently cured |
The Most Important Troubleshooting Habit
Frequently Asked Questions
Do I need an airbrush to paint a good model?
No.
Many modelers produce attractive results using brushes and suitable hobby paints.
An airbrush is particularly useful for larger surfaces, controlled spraying, and certain advanced techniques, but it’s not essential for beginning the hobby.
How many coats of paint should I apply?
There is no universal number.
Some paints provide good coverage with one or two applications, while others require additional coats.
Apply only enough paint to achieve the desired finish without obscuring detail.
Follow the product’s recoat instructions.
How long should I wait between coats?
Follow the paint manufacturer’s recommendations.
Drying and curing times vary by product, coat thickness, temperature, humidity, and other conditions.
Don’t assume that a coating is ready for masking or a different paint system simply because it feels dry to the touch.
Can I paint directly onto bare plastic?
Sometimes.
Some model paints adhere reliably to properly prepared plastic without a separate primer.
Other paints benefit significantly from priming.
Test your chosen combination if you’re uncertain.
Should I paint parts before assembling the model?
Some parts are easier to paint before assembly, particularly interiors and areas that become difficult to reach.
However, major exterior components often benefit from assembly, seam correction, and surface preparation before final painting.
Plan the painting sequence around the model’s construction.
Can I use regular craft acrylic paint?
Some craft acrylic paints can be used for certain modeling applications, but not all are formulated to preserve fine scale-model detail or adhere well to plastic.
Purpose-made hobby paints are generally easier to work with when learning techniques specific to scale modeling.
What if I make a mistake while painting?
Most painting mistakes can be corrected.
Small errors may be touched up after drying.
Larger problems might require smoothing, removing a defective layer, or repainting an area.
Use a correction method appropriate for the paint and underlying materials.
Avoid aggressive chemicals unless you know they’re compatible.
Do I need to weather my model?
No.
A clean, carefully painted model can look excellent.
Weathering is an optional technique, not a requirement for completing a project.
Your First Model Painting Checklist
Before declaring your first paint job complete, work through this checklist:
- Have I chosen a manageable color scheme?
- Do I have the paints, brushes, and other supplies I need?
- Is the model properly assembled, cleaned, and prepared?
- Have I applied primer if my paint and surface combination calls for it?
- Have I tested unfamiliar paint or thinner combinations?
- Am I working with appropriate ventilation and safety precautions?
- Have I applied the main colors using controlled coats?
- Have I allowed sufficient drying and curing time?
- Have I painted the most visible small details?
- Have I corrected any obvious paint runs, missed spots, or rough areas?
- Have I applied decals and any optional finishing products correctly?
- Am I satisfied with the result?
If you can work through these steps, you’ve completed much more than simply putting color on plastic.
You’ve learned the foundations of scale-model painting.
Final Thoughts: Your First Paint Job Is Just the Beginning
Painting your first scale model can feel intimidating, particularly when you’re surrounded by photographs of beautifully finished models online.
It’s easy to forget that experienced modelers developed their skills through practice, experimentation, and plenty of mistakes.
Nobody learns everything about painting in a single project.
Start with a manageable color scheme, use suitable materials, and concentrate on applying paint carefully.
Learn what works for your equipment and preferred paint brands.
As you gain confidence, you can explore more advanced techniques such as airbrushing, camouflage patterns, washes, drybrushing, weathering, and realistic metallic finishes.
Most importantly, enjoy the process.
There’s something uniquely satisfying about watching an ordinary collection of plastic parts take on color, depth, and character.
Happy modeling!
— Duneland Model Club