Getting Started in Scale Modeling
Scale modeling is a hobby built around creating miniature representations of aircraft, armor, automobiles, ships, spacecraft, figures, and countless other subjects. You don’t need a workshop full of tools or years of experience to get started. A basic kit, a few essential tools, and some patience are enough to build your first model.
Choose Your First Kit
Pick a subject that interests you and look for a kit with a moderate part count, good fit, clear instructions, and a simple paint scheme. Mainstream injection-molded plastic kits from trusted brands are usually the best place to start.
- Choose a subject you actually care about.
- Avoid extremely high part counts for your first build.
- Avoid kits dominated by photo-etched metal, complex resin, or extensive rigging.
- Look for clear instructions and a manageable paint scheme.
- Snap-fit or simplified kits are perfectly valid starting points.
- A first kit does not need to be expensive or complicated.
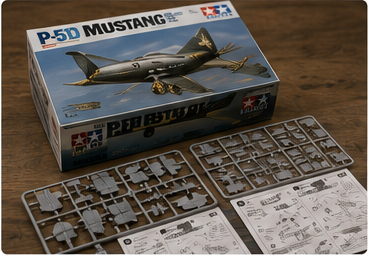
Understand What’s in the Box
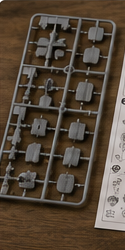
Sprues
Plastic frames that hold the kit parts. Parts are cut carefully from the sprue before assembly.
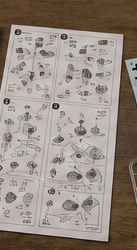
Instructions
The assembly sequence, paint references, optional configurations, and other important information for the build.
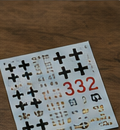
Decals
Thin printed markings that are usually applied after the main painting is complete.
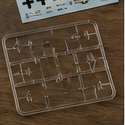
Clear Parts
Transparent parts used for canopies, windows, lenses, lights, and other clear details. Handle them carefully to avoid scratches.
Your Basic Starter Toolkit
You really need:
- Sprue Cutters For cleanly removing parts from the sprue.
- Hobby Knife For trimming attachment points and cleanup.
- Sanding Sticks / Files For smoothing parts and seams.
- Plastic Cement For joining most injection-molded plastic parts.
- Tweezers Helpful for small parts and decals.
- A Few Brushes Useful for detail painting and touch-ups.
Set Up a Simple Workspace
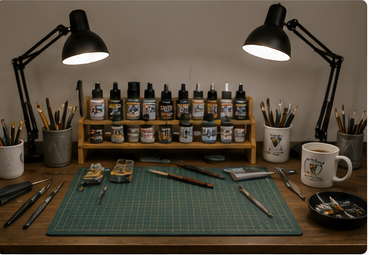
- Use good lighting.
- Work on a flat, stable surface.
- Protect the work surface.
- Keep parts organized.
- Provide appropriate ventilation when using paints, sprays, or solvents.
- Keep food and drinks away from hobby chemicals.
- Store sharp tools safely when not in use.
Read the Instructions Before You Build
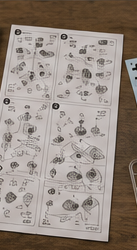
- Look through the entire instruction sheet before cutting parts.
- Identify assemblies that may need painting before final assembly.
- Check for optional parts or configurations.
- Watch for holes that may need to be opened before parts are glued together.
- Check decal options before choosing final parts/configurations.
Dry Fit First
Test fit parts together without glue to check alignment and fit. This simple step can prevent many problems later.
Remove and Clean the Parts
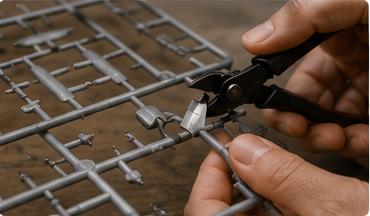
- Cut
- Trim
- Sand
- Test Fit
- Glue
Do not twist parts off the sprue. Use sprue cutters to remove the part with a small amount of material remaining, then trim and sand the attachment point carefully.
- Watch for mold seams and minor flash.
- Trim carefully and sand only as much as necessary.
Assembly: Take Your Time
- Use small amounts of cement.
- More glue is not stronger.
- Allow joints time to set.
- Align parts before the glue fully cures.
- Work in logical subassemblies.
- Test fit frequently.
Dealing With Seams
Joined parts can leave visible seams or gaps. A simple process can help:
- Let the joint dry.
- Sand the seam.
- Apply a small amount of filler if necessary.
- Sand smooth again.
- Check the surface before painting.
Tutorial Coming Soon
Painting Your First Model
- Prepare
- Prime
- Paint
- Details
- Clear Coat
You can start with brush painting or spray cans. An airbrush can come later if you choose.
Explore Painting & Finishing Guides →Applying Decals
- Paint the model and allow the surface to dry.
- A smooth or gloss surface usually helps reduce visible carrier film.
- Cut out one decal at a time.
- Soak according to the decal instructions.
- Slide the decal into position.
- Remove excess water carefully.
- Allow it to dry.
- Protect it later with an appropriate clear finish if desired.
Tutorial Coming Soon
Finishing the Build
- Inspect for missed areas.
- Touch up paint.
- Remove masking.
- Install fragile final parts.
- Apply the final clear finish if desired.
- Remove dust and fingerprints.
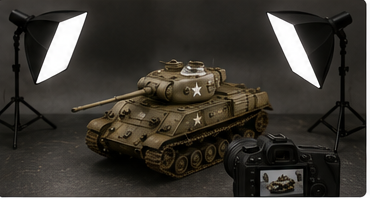
Take Some Photos
Good model photography doesn’t require expensive equipment—a smartphone and simple lighting can produce excellent results.
Your First Model Doesn’t Have to Be Perfect
Your first model is the beginning of the learning process, not a final exam. You may notice seams you missed, paint that could be smoother, or a decal that isn’t perfectly straight. That’s normal.
Finish the model, take note of what you’d like to improve, and bring that lesson to the next build.
Quick First-Build Checklist
Before You Start
- Choose a manageable kit
- Read the instructions
- Gather basic tools
- Prepare the workspace
While You Build
- Test fit parts
- Trim and sand attachment points
- Use glue sparingly
- Let assemblies dry
- Paint in thin coats
Before You Call It Finished
- Check paint touch-ups
- Apply decals
- Add fragile final parts
- Take photographs
- Enjoy the fact that you finished it