Understanding Model Paints & Thinners
The Right Paint Is Only Half the Equation
You’ve picked out the colors for your next scale model. The instructions call for olive drab, flat black, and aluminum, and the hobby shop has shelves filled with bottles that seem to offer exactly what you need. Then you notice the labels: acrylic, enamel, lacquer, airbrush ready, thinner, retarder, and cleaner.
Why so many choices? Can you use the same thinner for all of them? And what happens when a paint that sprays beautifully through an airbrush refuses to behave with a paintbrush?
Understanding model paints doesn’t require a chemistry degree. It does require knowing which paint family you have, which products belong with it, and how to adjust the paint for the job. These decisions affect smoothness, adhesion, drying time, cleaning, and the durability of your finished model.
This guide explains the major hobby paint families, the purpose of thinner and other additives, how to mix paint for brush or airbrush application, and how to avoid the compatibility mistakes that can ruin a carefully prepared finish.
What Is Actually Inside Model Paint?
Most model paints contain several components that work together to form a coating.
When you add thinner, you are changing the paint’s concentration and flow behavior. You are not necessarily improving the paint simply by making it more watery.
- Pigment: Tiny particles that give the paint its color and, in many cases, its opacity. Metallic paints may contain reflective flakes or other effect pigments.
- Binder or resin: The material that holds the pigment in place and forms the film that remains on the model after drying or curing.
- Carrier or solvent: The liquid that makes the paint usable. Much of it leaves as the coating dries, but the chemistry and curing process vary by product.
- Additives: Small amounts of ingredients that may influence flow, leveling, drying, sheen, or stability.
Too much or the wrong thinner can weaken coverage, cause separation, change how the paint adheres, or produce a rough finish.
Drying and Curing Are Different
Dry to the touch means you can touch the surface lightly without obvious wet paint transferring. Cured means the coating has progressed far enough toward its intended final properties for the next operation.
A paint can feel dry while remaining vulnerable to masking tape, stronger solvents, or heavy handling. Always follow the product’s instructions for recoating, masking, polishing, and applying another paint system.
The Main Paint Families at a Glance
The broad categories below are useful starting points, but names on hobby labels are not always chemically precise. In particular, “acrylic” describes a type of binder, not one universal thinner.
| Paint Family | Typical Strengths | Common Applications | Thinning and Cleanup |
|---|---|---|---|
| Water-based hobby acrylics | Convenient brush use, relatively easy wet cleanup, broad color selection | Brush painting, figures, detail work, some airbrushing | Water or the specific maker’s compatible acrylic thinner, as directed |
| Water-soluble / alcohol-compatible hobby acrylics | Good coverage and useful spray performance in many ranges | General color coats, brush or airbrush depending on formulation | The brand’s designated thinner; do not assume plain water gives the best result |
| Traditional solvent-based enamels | Often good brush flow and extended working time | General painting, details, some washes and weathering | Designated enamel thinner or other explicitly approved thinner |
| Hobby lacquer paints | Often smooth spray application and relatively fast drying | Airbrushed base coats, metallic finishes, automotive and aircraft work | Designated lacquer-system thinner, with suitable solvent precautions |
No category is automatically the “best”. Each has products that work well for particular jobs.
For example, a water-based acrylic may be ideal for painting cockpit switches by brush, while a lacquer system may be more convenient for a broad, smooth airbrushed aircraft finish. Your tools, workspace, and preferred subjects also matter.
Don’t Let Similar Paint Names Fool You
Tamiya has sold X/XF colors in more than one paint family in different markets. A number such as XF-1 does not by itself identify the paint chemistry. Look for the full words Acrylic Paint, Enamel Paint, or Lacquer Paint on the actual product.
Likewise, different ranges from the same manufacturer may require different thinners. Brand familiarity is not a substitute for reading the individual label.
Water-Based Acrylic Paints
Water-based acrylic hobby paints are common in scale modeling, miniature painting, and figure painting. Many are designed to brush smoothly, while others are formulated for airbrush use.
Why Modelers Like Them
- Many can be cleaned from brushes with water before they dry.
- Brush-oriented ranges provide good control for figures, interiors, and small details.
- They are available in a wide variety of military, civilian, fantasy, and general-purpose colors.
- Some product lines are formulated to spray directly from the bottle.
Vallejo Model Color, for example, is designed primarily for brush application. Vallejo Model Air is formulated specifically for airbrushing and can often be sprayed as supplied, subject to equipment and conditions.
A Common Mistake: Too Much Water
Although water is suitable for thinning many water-based acrylics, adding an excessive amount can lead to poor coverage, uncontrolled flow, or changes in film performance.
A manufacturer’s acrylic thinner may help maintain the paint’s intended behavior better than arbitrary amounts of water, particularly for airbrushing.
If a paint is already ready to use, don’t thin it merely out of habit.
What to Watch For
Some water-based acrylic paints dry quickly on the brush or airbrush needle. This can cause visible brush texture or tip dry during airbrushing.
Compatible flow improver or retarder products may help in certain cases, but use them sparingly and only as directed.
Water-Soluble Acrylics That Use Specialized Thinners
Some model paints are described as acrylics and are water-soluble, yet perform best with a designated thinner that contains additional ingredients, including alcohols or other solvents.
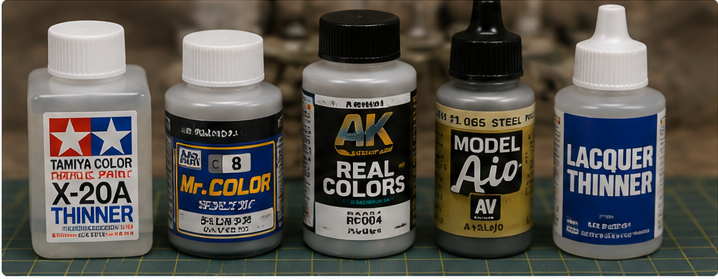
Tamiya Color X/XF acrylic paints are a familiar example. Tamiya specifically sells X-20A Acrylic Thinner for its acrylic range.
Mr. Hobby’s Aqueous Hobby Color is another distinct acrylic paint range with its own Aqueous thinner. It should not be confused with Mr. Color lacquer paint.
Why Not Just Use Whatever Is on the Bench?
Different thinner formulations can affect drying, leveling, spray behavior, and compatibility. A mixture may initially look smooth but behave poorly once applied.
You may encounter online suggestions for substituting alcohol or other household liquids. Such substitutions are not universal and can introduce safety, adhesion, or performance problems.
For predictable results, especially as a beginner, use the maker’s designated product and test before experimenting.
Traditional Enamel Paints
Enamel paints were standard equipment on modeling benches long before many modern water-based ranges became popular. They remain useful for brush painting, certain finishes, and some weathering methods.
Traditional hobby enamels commonly use a solvent-based carrier and need a compatible enamel thinner for dilution and cleanup.
Strengths of Enamels
Many enamel colors have a comfortable working time for brush application and can settle into a relatively smooth film. Their slower drying behavior can be useful when painting small details or blending compatible effects.
Enamels are also used in some washes and weathering products, but a weathering wash should not automatically be treated as ordinary enamel color paint. Follow the instructions for that specific product.
The Trade-Offs
- A coating may remain vulnerable to handling or further finishing longer than expected.
- Solvent odors, flammability, and respiratory or skin exposure require attention.
- Enamel thinners are not interchangeable with water-based acrylic thinners.
- Certain aggressive topcoats may damage enamel paint underneath, even after it appears dry.
Humbrol and Tamiya both publish instructions for enamel products. Tamiya identifies X-20 Enamel Thinner for its enamel range; that is not the same product as X-20A acrylic thinner.
Hobby Lacquer Paints
Hobby lacquer paints are often selected for their smooth spraying characteristics, fast solvent evaporation, and the durable finishes many formulations can produce.
They’re popular for aircraft, armor, and automotive models, especially when an airbrush is available.
Examples include Tamiya LP lacquer paints and Mr. Color. Each has a manufacturer-recommended thinner system. For instance, Tamiya identifies LP-10 as a thinner for its LP lacquer range, and Mr. Hobby offers Mr. Color Thinner and Mr. Color Leveling Thinner for its Mr. Color products.
Why Experienced Modelers Use Lacquers
- Many spray finely and build smooth, thin color coats.
- Some finishes tolerate careful masking well once properly cured.
- Various lacquer ranges offer useful metallic colors and specialized finishing products.
Why They Require More Care
Lacquer solvents may soften or attack bare plastic, incompatible primers, or earlier paint layers. Heavy, wet passes are especially risky on sensitive surfaces.
They may also present significant vapor and fire hazards. Use spraying equipment, ventilation, and protection appropriate for the exact material; not every hobby spray booth is suitable for flammable solvent coatings.
Match the Thinner to the Exact Paint Range
The most important purchase after the paint may be the correct thinner. It is the simplest way to avoid many mixing and application problems.
| Paint Product / Range | Manufacturer-Identified Thinner or Approach | Avoid This Mix-Up |
|---|---|---|
| Vallejo Model Color | Water or appropriate Vallejo thinning product, depending on technique | Don’t treat it like a solvent lacquer paint |
| Vallejo Model Air | Often airbrush-ready; Vallejo Airbrush Thinner if needed | Don’t assume every bottle needs thinning |
| Tamiya Color X/XF Acrylic | Tamiya X-20A Acrylic Thinner | X-20 is for enamels, not X-20A’s substitute |
| Tamiya Color X/XF Enamel | Tamiya X-20 Enamel Thinner where that range is sold | Don’t rely on the shared X/XF color code to identify chemistry |
| Tamiya LP Lacquer | Tamiya lacquer thinner specified for the LP range, such as LP-10 | Don’t substitute X-20 enamel thinner |
| Mr. Hobby Aqueous Hobby Color | Mr. Hobby Aqueous Thinner or another explicitly approved option | Don’t mistake Aqueous for Mr. Color |
| Mr. Color | Mr. Color Thinner or Mr. Color Leveling Thinner as directed | Don’t use Aqueous thinner simply because both are Mr. Hobby products |
| Humbrol Enamel | Humbrol Enamel Thinners as directed | Don’t use a water-based acrylic thinner |
These are illustrative manufacturer-product pairings, not an exhaustive compatibility chart. Verify the actual label and current manufacturer directions, particularly for specialized products and newer formulations.
What About Mixing Brands?
Some experienced modelers use cross-brand combinations successfully. That doesn’t mean a substitute is automatically approved or safe for every formulation.
Cross-brand thinning or mixing can produce clumps, separation, poor adhesion, inconsistent color, or abnormal drying. If you’re learning, avoid treating online recipes as universal rules.
Thinner, Cleaner, Flow Improver, and Retarder: What’s the Difference?
These products sit next to each other on hobby-store shelves, but they do different jobs.
| Product | Primary Purpose | Practical Caution |
|---|---|---|
| Thinner / reducer | Adjusts paint concentration and flow for an approved application method | The wrong chemistry may destabilize the paint |
| Airbrush cleaner / brush cleaner | Removes paint residue from tools | May be too aggressive to mix into paint or use on the model |
| Flow improver | Changes wetting and flow in certain compatible paints | Too much can cause unwanted spreading or delayed drying |
| Retarder | Slows drying to extend working time in compatible formulations | Excess can cause tackiness or delayed curing |
| Leveling thinner | A product-specific thinner formulated to improve leveling for compatible paint systems | Not universal; may be solvent-rich and unsuitable for other ranges |
| Paint medium | Alters particular paint properties such as transparency or finish | Must match the paint system and intended effect |
Never assume that a cleaner is suitable as a paint thinner simply because both products remove or dissolve wet paint.
Example: Preventing Airbrush Tip Dry
If compatible water-based acrylic paint starts drying on the airbrush needle, you may need to review airflow, spray time, thinning, and equipment cleanliness. A small amount of approved flow improver or retarder may be useful for certain paints.
But if the paint is already separating or spitting, adding random chemicals may make matters worse. Diagnose the cause first.
There Is No Universal Thinning Ratio
You may have heard that all airbrush paint should have the consistency of milk or that every paint should be mixed 50/50.
Those shortcuts can be misleading.
Paint viscosity, pigment type, the airbrush nozzle, air pressure, temperature, and the desired effect all influence the useful mixture.
Some paints are already formulated for airbrushing. Others start comparatively thick and require more thinner. A metallic paint may behave differently from a flat color in the same range.
What About Manufacturer Ratios?
Use them as a starting point, not a substitute for testing. For example, Mr. Hobby’s published guidance for Mr. Color has described airbrush mixing at approximately 1 part paint to 1.5–2 parts thinner. Vallejo’s Model Air, by contrast, is generally formulated for spraying straight from its bottle. These are different products with different intended starting conditions.
Follow the current instructions for your own product, because ranges and formulations can change.
Signs of a Good Mix
A workable mixture should:
- Leave the brush or airbrush predictably rather than spitting, dragging, or flooding.
- Cover gradually without forming thick ridges or heavy puddles.
- Stay reasonably uniform without grains, clumps, or separation.
- Preserve panel lines and other fine surface detail.
- Reach the intended finish after the appropriate number of controlled coats.
Step by Step: Thin Paint for Brush Painting
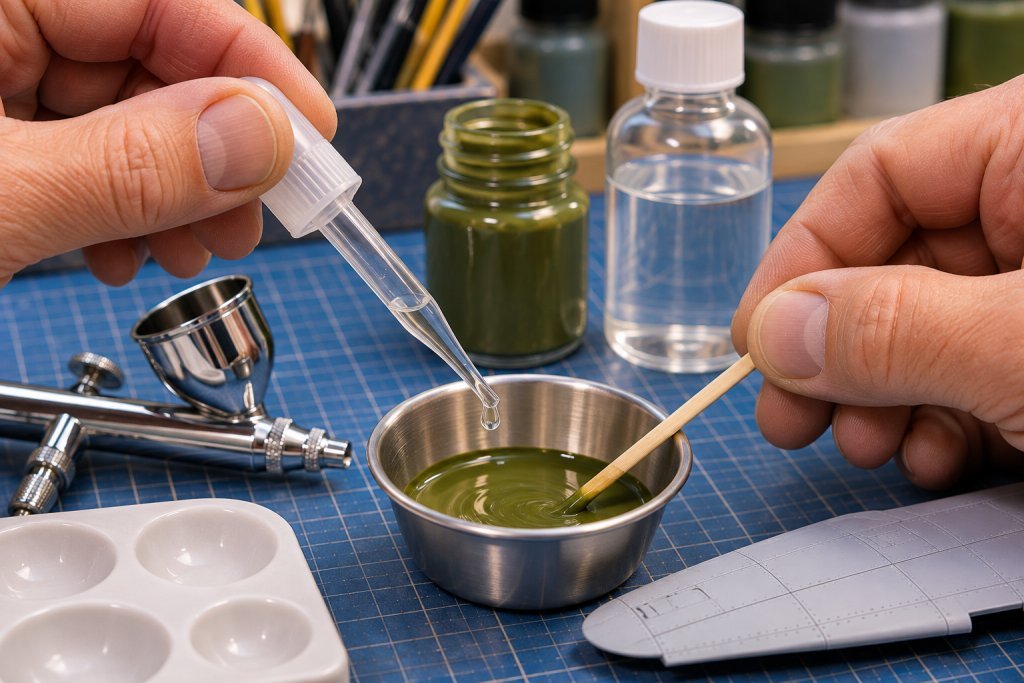
For brush painting, the goal is control and a smooth, even film. Many brush-formulated colors need little thinning, if any.
Step 1 – Mix the Original Paint
Shake or stir the container as directed until the color is uniform. Paint that has separated during storage won’t behave predictably until remixed properly.
Step 2 – Transfer a Small Amount
Put paint on a clean palette. Avoid routinely adding thinner directly to the entire original bottle because it can change the stored paint’s properties.
Step 3 – Add Compatible Thinner Only When Needed
Start with very small additions rather than a large pour. Mix thoroughly and observe the paint’s movement.
Step 4 – Test on Spare Plastic
Use a primed scrap part similar to your model. A suitable brush mix should flow off the bristles without leaving thick brush ridges or immediately running into every recess.
Step 5 – Apply Controlled Coats
Use a brush appropriate to the area, spread paint with gentle strokes, and avoid reworking a layer as it begins to set.
Step 6 – Allow the Layer to Dry
Follow the manufacturer’s recoat guidance. Build coverage with additional controlled coats instead of a single heavy application.
Watch for Over-Thinning
Paint that forms uncontrollable puddles, takes on excessive transparency, or fails to adhere properly may be too thin, although contamination or poor surface preparation can cause similar symptoms.
Step by Step: Prepare Paint for an Airbrush
Airbrushing depends on paint chemistry, air supply, nozzle size, distance, and how much paint you release. Thinning is one part of that system.
Step 1 – Confirm That the Paint Can Be Sprayed
Check the label. Not every product intended for brush use is suitable for an airbrush, and not every specialized coating should be atomized in a home hobby setup.
Step 2 – Check Your Safety Setup
Use appropriate spray capture and ventilation before atomizing the paint. Review the product’s safety information, including vapor, particle, and flammability hazards. Do not spray a product that your booth or protective equipment isn’t rated to handle.
Step 3 – Prepare a Separate Small Batch
For products that need thinning, put a measured amount in a clean mixing cup. Add the designated thinner in the manufacturer’s recommended starting proportion.
Step 4 – Mix Thoroughly
Ensure the liquid is uniform. If the product forms lumps, curdles, or separates, stop; do not attempt to salvage an incompatible mixture by spraying it.
Step 5 – Test the Pattern
Spray lines and small patches onto spare plastic, a practice board, or an appropriate test surface. Observe flow, coverage, and how the coating dries.
Step 6 – Make Small Adjustments
If the spray sputters or produces an overly coarse pattern, review paint mix, nozzle condition, air settings, and distance. If it runs or puddles, decrease the amount deposited and check whether the paint is overly thin.
Change only one variable at a time whenever possible.
Step 7 – Paint in Light Passes
Work around the model gradually. Allow the product’s required intervals between passes or coats, and avoid drowning delicate detail in paint.
Step 8 – Clean Up Promptly
Empty the airbrush safely and clean with the correct product for the paint you actually used. Follow the airbrush maker’s instructions for seals, needles, and disassembly.
Can You Mix Different Paint Brands or Colors?
Mixing two colors within the same manufacturer’s compatible paint range is often straightforward, but not every pair of colors, mediums, or special-effect products is guaranteed to behave identically.
Mixing paints from different families is more uncertain.
Do not assume that two paints are compatible merely because both labels say acrylic. Their resins, carriers, pigments, and additives may differ.
A Better Way to Mix a Custom Color
- Choose paints that the manufacturer identifies as compatible.
- Mix a small trial batch on a palette or in a separate cup.
- Record the approximate parts of each color.
- Check for clumping or separation.
- Apply to a primed test piece and let it dry completely.
- Only then prepare enough for the model.
Keep Your Color Records
If you create a useful custom military green, interior gray, or weathered brown, note the colors and proportions.
This helps when you need to touch up the model later or paint additional subassemblies.
A small swatch card can also show the final color over white, gray, or black primer.
Painting Over Another Paint System: Compatibility Matters
Many scale models contain more than one kind of coating: primer, base color, detail paint, decals, clear coats, and weathering products.
Using multiple systems can work very well, but the sequence must be compatible.
Why Problems Happen
A strong solvent in a new coat may soften or lift an earlier layer. Other combinations may suffer from poor adhesion even when no visible chemical reaction occurs.
A protective clear coat may help in an approved system, but it is not an indestructible shield against aggressive solvents.
A Safe Way to Test Layers
- Prepare spare plastic using the same primer and base colors as the real model.
- Let each coating cure according to its manufacturer’s instructions.
- Apply the proposed next product in the same way you intend to use it on the model.
- Check for wrinkling, cracking, lifting, color change, tackiness, and loss of detail.
- If the test passes, proceed carefully with controlled application.
Is It Always Lacquer First, Then Enamel, Then Acrylic?
You may encounter simple rules based on placing the “hottest” solvent first. They can be helpful reminders, but they are not universal compatibility guarantees.
Paint chemistry varies by brand. Some combinations work only with very light coats and adequate curing; others should not be layered at all. For example, Tamiya cautions against lacquer over its enamel paints.
Use product-specific directions and a test piece rather than a blanket formula.
Primer and Surface Preparation Still Matter
The most carefully mixed paint cannot reliably compensate for a dirty or unsuitable surface.
Before painting, check for fingerprints, sanding residue, glue marks, and other contamination. Correct construction defects and allow washed surfaces to dry fully.
A suitable primer can help create a consistent foundation, especially where the model contains more than one material or has undergone filling and sanding.
Does Every Paint Require Primer?
No. Some paints adhere well to appropriately prepared plastic without a separate primer. Others benefit from one, especially on metal, resin, or frequently handled surfaces.
Read the relevant manufacturer’s instructions and test if unsure.
Don’t Thin Away an Adhesion Problem
If paint beads on the surface or lifts under masking tape, excessive thinning may be only one possible cause. The underlying issue might be surface contamination, insufficient curing, or an incompatible coating system.
Cleaning Paintbrushes and Airbrushes Properly
Correct cleanup protects your equipment and prevents old paint from contaminating the next color.
Brushes
For compatible water-based acrylics, rinse promptly in water while the paint is still wet, following the product’s directions. A suitable brush soap may help remove remaining residue.
For enamels and lacquers, use the maker-approved cleaner and observe its safety precautions. Keep solvents out of the brush ferrule where practical, avoid prolonged soaking, and reshape clean bristles gently.
Airbrushes
After spraying, empty unused paint appropriately. Use the cleaner specified for the paint system and airbrush materials. Follow the airbrush manufacturer’s instructions when flushing, disassembling, or cleaning needles and nozzles.
Don’t force solvents through an airbrush in an unsafe, unventilated environment. Some cleaners are flammable or create irritating vapors or mist.
Avoid Cross-Contamination
A cup or brush with residual solvent can spoil the next batch of water-based paint. Clean and dry tools appropriately before switching families.
Keep paint thinners, strong cleaning products, and clear water in separate, clearly identified containers. Never use food or drink containers for solvents.
Storing Paints and Thinners Safely
Good storage keeps your supplies usable longer and reduces avoidable exposure risks.
Keep lids tightly closed, wipe bottle rims clean when appropriate, and store products in accordance with their labels and safety data sheets.
A Few Useful Habits
- Store paints away from excessive heat, direct sunlight, and freezing conditions when the product requires it.
- Keep flammable solvents in appropriate original containers, away from ignition sources.
- Label any permitted transfer container clearly; never use an unmarked bottle.
- Keep chemicals away from food, children, and pets.
- Record when a paint has been mixed or transferred to another container.
- Dispose of unusable paint and used solvents according to local requirements and product instructions.
Can You Rescue Thick or Old Paint?
Sometimes, but investigate why it thickened. Pigment settling may only require proper remixing. A coating that has chemically cured, formed a persistent skin, become contaminated, or separated irreversibly may not be recoverable.
Do not pour strong thinner into an old bottle at random. Check whether the manufacturer provides a suitable restoring product or recommends discarding it.
A Safety Check Before You Open the Thinner
Paints and thinners range from relatively low-odor brush products to highly flammable solvent systems. The correct precautions depend on the actual chemicals and application method.
Brush Painting Is Not the Same as Spraying
Brush painting generally produces less airborne paint than spraying, but solvent vapors, skin contact, spills, and flammability may still be concerns.
Airbrushing creates airborne droplets even when the paint is water-based. Solvent-based products may additionally release hazardous vapors.
Build a Safe Working Setup
Read the label and safety data sheet (SDS), use appropriate local exhaust ventilation and any required respiratory protection, and verify that the spray booth is suitable for the product. A basic dust mask does not protect against organic solvent vapors. An ordinary hobby booth is not automatically rated for flammable products.
Wear appropriate eye and skin protection and keep ignition sources away from flammable materials. Do not improvise with strong household solvents or spray industrial two-part coatings containing hazardous isocyanates in a normal hobby setup.
When in doubt about ventilation, equipment, or protective measures, do not spray the product until you have a suitable arrangement.
Common Paint and Thinner Problems — and How to Fix Them
Most mixing problems become easier to solve when you identify whether the issue is paint chemistry, technique, surface condition, or insufficient curing.
| Problem | Possible Cause | What to Do |
|---|---|---|
| Paint clumps or curdles when thinned | Incompatible thinner or contaminated mixing cup | Stop; discard the test mixture safely and use the approved thinner with clean tools |
| Paint separates or forms grains | Poor mixing, product incompatibility, or degraded paint | Recheck the label and product condition; don’t spray an unstable mixture |
| Airbrush sputters | Mixture too thick, blocked nozzle, low/unstable air, or dried paint | Test flow and settings; inspect and clean equipment using the correct cleaner |
| Paint runs or puddles | Too much paint in one pass, excessive thinning, or spraying too close | Reduce deposition, adjust technique, and let the defective area cure before repair |
| Rough or grainy sprayed finish | Paint drying before reaching the surface, poor atomization, or incorrect distance | Review thinner, spray settings, and conditions; test again before returning to the model |
| Visible brush ridges | Paint too thick, unsuitable brush, or overworking drying paint | Adjust consistency and brush choice; use smoother, controlled strokes |
| Paint beads or pulls away | Contamination, surface tension, or incompatible substrate | Clean and prepare a test piece; use appropriate primer or compatible paint |
| Paint lifts under masking tape | Inadequate adhesion, insufficient curing, or incompatible products | Remove loose material, correct surface preparation, and allow proper curing |
| Previous color wrinkles under a new coat | Aggressive solvent or incompatible layering | Stop coating; allow curing and repair as appropriate; test the system before retrying |
| Paint stays soft or sticky | Incomplete curing, heavy coats, or excessive/incompatible additive | Follow product guidance and don’t bury persistent tackiness under another coat |
| Brush or airbrush is difficult to clean | Paint dried in the tool or wrong cleaner used | Use the appropriate approved cleaner and proper equipment-care procedure |
The Most Important Troubleshooting Habit
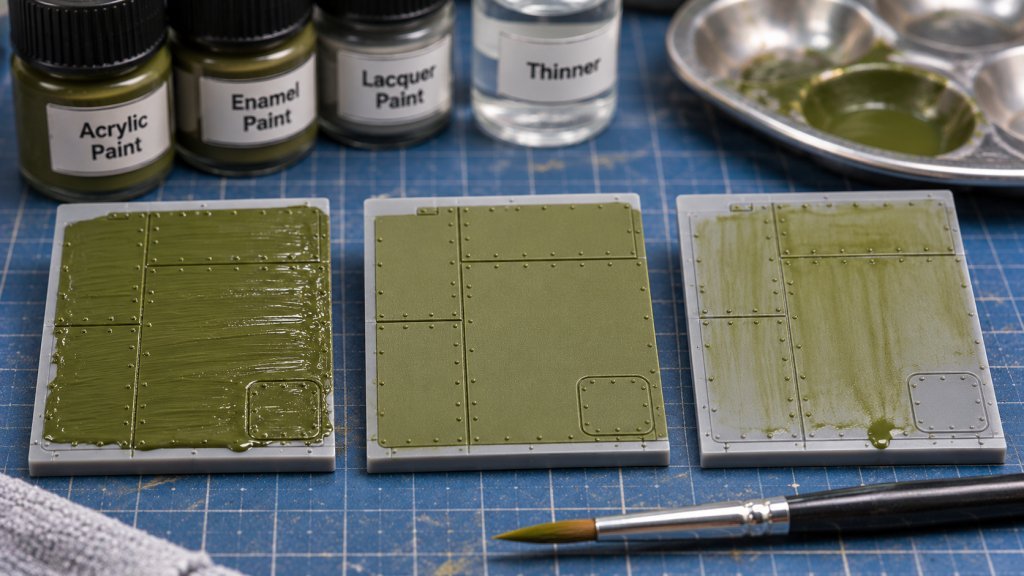
Mix and test small quantities first. A spare painted wing, tank panel, or scrap sheet of styrene can reveal a bad paint/thinner combination before it reaches a nearly finished model.
Frequently Asked Questions
Can I use water to thin every acrylic model paint?
No. Some water-based acrylics accept water, but other acrylic ranges perform best with designated thinners. “Acrylic” alone does not identify the correct thinner. Read the product label.
What is the difference between Tamiya X-20 and X-20A?
Tamiya identifies X-20 as enamel thinner and X-20A as acrylic thinner for its acrylic range. The similar names are easy to confuse, but the products are not universal substitutes.
Is lacquer thinner the same as enamel thinner?
No. They are different product categories, and even thinners within one category can vary. Use a thinner intended for your exact paint.
Should I thin all airbrush paint 50/50?
No. Some airbrush paints are ready to spray, while others require different proportions. Start with the manufacturer’s recommendations and adjust on a practice surface.
Can I mix paint and thinner directly in the airbrush cup?
Some modelers do, but a separate mixing cup makes it easier to confirm consistency and catch clumps before they enter the airbrush. Follow the product and equipment guidance.
Can I use the same thinner to clean the airbrush?
Sometimes the manufacturer identifies a thinner for both jobs, but many cleaners are formulated differently and should not be mixed into paint. Read the label rather than guessing.
What if I accidentally mixed the wrong thinner into paint?
Do not use the mixture on your model. Set it aside for safe disposal according to the product instructions. Clean your tools with a compatible cleaner and prepare a new batch.
Can I paint acrylic over enamel or lacquer?
Some combinations work after proper curing, but compatibility depends on the specific products and application method. Test the full layer sequence rather than assuming a universal rule.
Why does my paint look different after it dries?
Pigment, primer color, film thickness, and surface sheen all affect appearance. Some paints also change slightly as the carrier leaves and the coating cures. Check a fully dried swatch under the light in which the model will be displayed.
Do I need a flow improver or retarder?
Not necessarily. Use them only when a specific, compatible paint and technique would benefit, and follow the recommended amount. More additive does not automatically produce a better finish.
Can I pour leftover acrylic paint down the sink?
Don’t assume so. Disposal requirements vary with the product and local regulations. Consult the manufacturer’s directions and your local waste guidance.
Your Model Paints & Thinners Checklist
Before painting, ask yourself:
- Do I know the exact brand and paint range, not just the color number?
- Have I identified the correct thinner for that specific range?
- Is the paint intended for brush application, airbrushing, or both?
- Have I prepared a clean palette or mixing cup?
- Have I mixed the original paint thoroughly?
- Am I following the manufacturer’s guidance rather than a universal ratio?
- Have I tested consistency and coverage on spare plastic?
- Is my primer or previous paint layer compatible and sufficiently cured?
- Have I reviewed safety requirements for spraying or handling solvents?
- Do I have the correct cleanup supplies ready?
- Will I store and dispose of paint and thinner properly?
If you can answer yes, you’re much less likely to discover a preventable chemistry problem halfway through a carefully planned paint job.
Final Thoughts: Learn Your Paint System, Then Expand
There is no single paint brand, thinner, or mixing ratio that every modeler must use. Excellent models have been painted with water-based acrylics, traditional enamels, hobby lacquers, and combinations chosen thoughtfully for particular tasks.
What matters is understanding the materials on your bench. Identify the exact paint, choose the compatible thinner, mix a small batch, test it, and give each coat the time it needs.
Once you can repeat a smooth brush stroke or predictable airbrush pass, experimenting with new colors and techniques becomes far less intimidating.
Start with one compatible system. Keep notes on what works. Add new products when they solve a real modeling problem rather than simply because they’re different.
Happy modeling!
— Duneland Model Club
Continue Learning
The DMC Painting & Finishing Guides also cover these related steps of the finishing process.