Gloss, Satin & Matte Clear Coats
The Finishing Touch That Brings a Model Together
You’ve assembled your scale model, applied the main colors, painted the details, and perhaps added decals or a little weathering. You’re almost finished. But one last decision can have a surprisingly large effect on how the completed model looks: the clear coat.
Should your aircraft have a dull, service-worn finish? Should your race car shine like polished paint? Would a subtle satin sheen look more convincing on a restored military vehicle? And why do experienced modelers sometimes apply a gloss coat even when the finished model is supposed to be matte?
Clear coats are not just a final spray of “protection.” Used thoughtfully, they help you control surface sheen, prepare for decals and certain weathering steps, and make different parts of a paint job look more consistent. Used carelessly, they can also introduce haze, runs, unwanted shine, or changes to metallic finishes.
This guide explains how gloss, satin, and matte clear coats work, when to use each one, and how to apply them with a brush, airbrush, or hobby spray can. We’ll also cover decal preparation, product compatibility, curing, and common problems—including the dreaded cloudy matte finish.
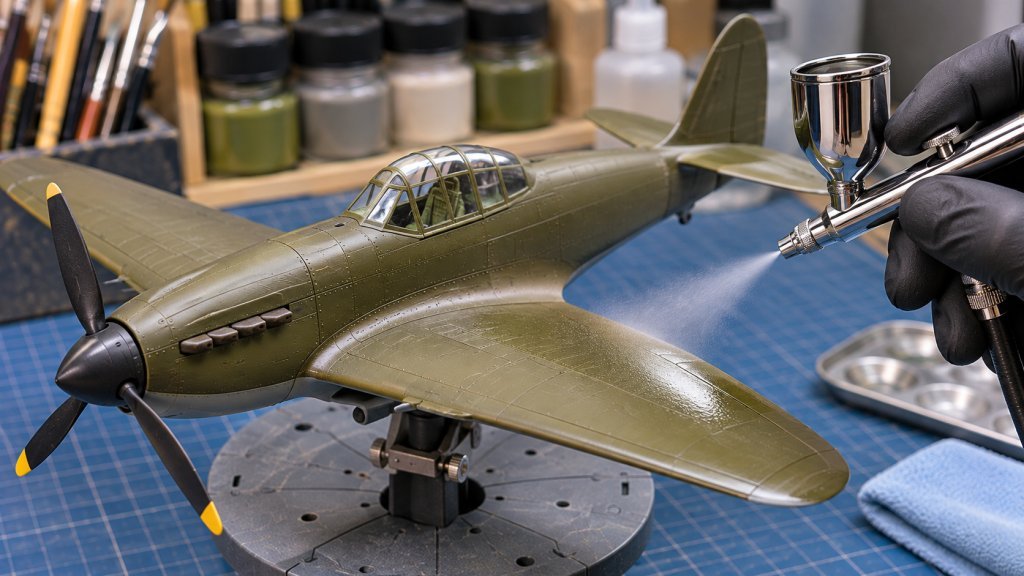
What Does a Clear Coat Actually Do?
A clear coat (sometimes called a clear varnish or topcoat) is a transparent coating applied over paint or other finished surfaces. It can be used during the painting process or as the final visible layer.
Depending on the product and how it is applied, a clear coat may:
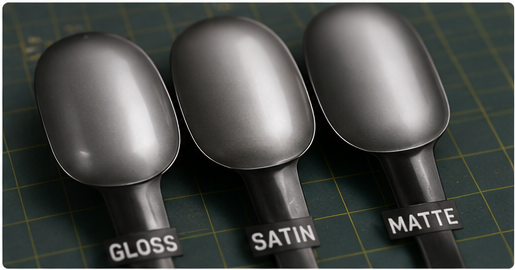
- Change the surface from glossy to satin or matte, or the other way around.
- Make areas painted with different products look more consistent.
- Provide a smoother surface for applying waterslide decals.
- Offer a compatible barrier before certain washes or weathering products.
- Provide some resistance to routine handling and minor wear.
- Help integrate decals visually with the surrounding paintwork.
But a clear coat has limits. It does not automatically make the model scratchproof, fix poor paint adhesion, remove dust or orange-peel texture, or guarantee that an incompatible wash or solvent cannot reach the layers below.
Think of it as a finishing tool, not a repair coating or an invincible shield.
Clear Coats Are Optional in Some Builds
If your paint already has the correct sheen, your decals are applied successfully, and you do not need a protective barrier for later techniques, another coat may be unnecessary.
There is no prize for applying the greatest number of layers. Every new layer adds a little thickness and another chance for something to go wrong.
Gloss, Satin, and Matte: What’s the Difference?
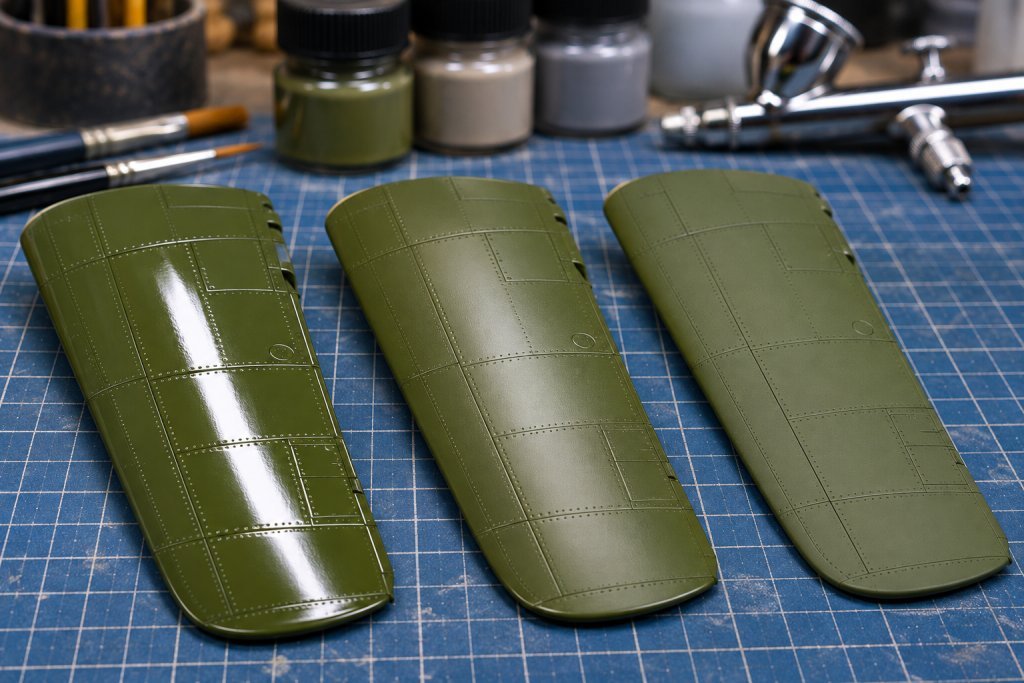
All three finishes are transparent, but they reflect light differently. The underlying color can stay essentially the same while its apparent depth, contrast, and texture change.
Gloss reflects light in clear, concentrated highlights. It can give paint a richer, more reflective appearance and is often appropriate for polished or recently painted subjects.
Satin (also called semi-gloss or semi-matte in some product ranges) creates a softer reflection. It provides some sheen without the mirror-like effect of full gloss.
Matte (often labeled flat) scatters reflections and reduces visible shine. It is useful for many military, weathered, and fabric-like surfaces.
| Finish | How It Looks | Common Modeling Uses | Watch Out For |
|---|---|---|---|
| Gloss | Bright reflections; smoother-looking, deeper color | Polished cars, selected civilian aircraft, decal preparation, glossy trim | Highlights every ripple, scratch, dust speck, and uneven patch |
| Satin / semi-gloss | Soft highlights with moderate reflection | Many aircraft and vehicles, restored equipment, painted metal, intermediate sheen | Can appear too shiny or too dull depending on lighting and product |
| Matte / flat | Low reflection; subdued surface | Many military subjects, worn paint, fabric-like areas, final blending of weathering | Heavy or poorly applied coats may look chalky, cloudy, or pale |
The difference is most obvious when light hits the surface at an angle. Judge test pieces under the same lighting conditions instead of deciding solely from the appearance of the liquid in its bottle.
Matte Is Not the Same as Rough
A properly applied matte coat can look even and refined. It does not need to feel sandy or appear visibly dusty.
If a matte coat leaves a rough, powdery surface, that’s usually an application problem rather than the intended effect.
Which Finish Looks Right on Your Model?
Start with the subject, not the label on the bottle. Think about what the real surface is made of, how it was painted, whether it is clean or weathered, and what the model is intended to represent.
| Subject or Surface | Often a Good Starting Point | Why |
|---|---|---|
| Showroom or polished automobile | Gloss | Reproduces the reflective character of polished body paint |
| Most ordinary painted military vehicles | Matte to satin | Helps avoid an unrealistic toy-like shine; actual vehicles vary |
| Operational aircraft camouflage | Matte to satin | Depends on the era, service, original coating, maintenance, and weathering |
| Restored or museum aircraft | Satin to gloss in selected areas | Restoration finishes may be cleaner or shinier than wartime examples |
| Ship hulls and painted superstructures | Matte to satin | Varies with scale, period, and surface material |
| Leather seats, rubber tires, and fabric | Usually matte to low satin | Different materials should not all reflect light like polished metal |
| Polished chrome or certain metallic finishes | Often no clear coat, or a specially compatible gloss | Many ordinary clears change the metallic effect |
These are starting points, not historical rules. A real wartime aircraft was not always completely flat, and a used vehicle can have localized polished or oily areas.
Vary the Sheen When It Makes Sense
A convincing model doesn’t have to be coated with one finish from nose to tail. A vehicle may have satin-painted body panels, matte tires, and slightly glossier lenses. A plane can have a subdued airframe with glossier instrument faces or small polished metal areas.
Use those differences deliberately. Too many random shiny spots can make a model look inconsistent, but a few material-specific sheen changes can add realism.
Where Do Clear Coats Fit in the Painting Sequence?
Clear coats can appear at several points in a build. The familiar “gloss for decals, matte at the end” sequence is useful, but it is not required for every model.
A Typical Aircraft or Armor Workflow
- Prepare and prime the model, if the materials and paint system call for it.
- Apply the main colors and let them dry or cure as required.
- Apply a compatible gloss coat, if needed, to create a smooth decal surface or prepare for a particular wash.
- Apply waterslide decals and any suitable decal products; let everything dry thoroughly.
- Seal decals with a compatible clear, if needed, before weathering or further handling.
- Add washes, filters, or weathering using a sequence that suits those specific products.
- Apply the chosen final sheen—gloss, satin, matte, or a combination—when the model is ready.
- Finish any parts that need a different sheen, such as lenses, instruments, polished metal, or rubber.
Not every build needs Steps 3, 5, and 7 as separate coats. An already smooth glossy paint may accept decals without an additional gloss layer. Some weathering products work best over satin or matte surfaces rather than gloss.
Why the Order Matters
Each coating changes the surface that the next product encounters.
A gloss surface often helps a pin wash flow along recesses and makes excess wash easier to remove when the products are compatible. A matte surface has more texture and may hold pigments or broad filters differently.
Choose the sequence according to the effects you want, and test the interaction between paint, clear, decals, and weathering products before attempting it on the finished model.
Choosing the Right Type of Clear Coat
Like model paints, clear coats come in different formulations. The word acrylic alone does not tell you everything about the solvents or thinners a product uses.
Water-Based Acrylic Varnishes
Many hobby acrylic varnishes are formulated for brush painting, airbrushing, or both. They can be a convenient choice for beginners, especially when used with an established compatible acrylic paint system.
Some products are designed to be used straight from the bottle; others require a recommended thinner for airbrushing. Cure time, brush behavior, and durability vary by brand.
Remember: Sprayed water-based varnish still produces airborne droplets. Ventilation and appropriate protection are necessary.
Solvent-Based Lacquer Clears
Lacquer-type clears can produce very smooth, durable finishes and are popular for demanding gloss work. They can also be aggressive toward some underlying paints, decals, and plastics.
A clear that works beautifully over one brand’s cured lacquer color may react badly with another company’s water-based acrylic or with an exposed decal.
Follow the manufacturer’s compatibility instructions, and never assume a strong lacquer clear is safe over any painted surface.
Enamel and Other Specialty Clears
Some enamel-based or specialized clear systems suit particular paint ranges or finishing effects. Their curing and recoat requirements can differ substantially from water-based acrylic varnishes.
Two-component automotive-type clear systems introduce additional chemical hazards; some use isocyanates and require controls beyond a typical hobby setup. They are not necessary for learning scale-model clear coating.
Bottled Versus Aerosol Products
Bottled products may be intended for brushing, airbrushing, or both. Check the label rather than assuming.
Aerosol clears cover broad areas conveniently but can deposit more material quickly. Their solvent strength, spray pattern, and safe-use conditions vary.
Check Compatibility Before You Coat the Model
A clear coat goes over work you’ve already invested time in, so this step deserves special attention.
Compatibility problems may show up as:
- Wrinkling, crazing, or softening of the base paint.
- Decal distortion, staining, or damaged edges.
- Clouding or loss of transparency on clear parts.
- A change in the appearance of metallic paint.
- Unexpected tackiness, poor adhesion, or lifting.
Make a Complete Test Piece
Don’t just spray your clear onto bare plastic and conclude that it is safe.
Prepare a spare piece with the same primer, base color, decals or representative decal film, and weathering materials you plan to use on the model.
Allow each layer to dry or cure according to its instructions. Then apply the clear coat exactly as you intend to apply it to the finished model.
Watch the test over time, not only during the first few minutes. Some problems appear as the coating dries or cures.
Why “Acrylic Over Enamel” Is Not a Complete Rule
Compatibility depends on the actual formulation, solvent strength, underlying coating, degree of curing, application thickness, and other factors—not merely on the broad labels acrylic, enamel, or lacquer.
When in doubt, use documented manufacturer guidance and a test piece. Do not experiment with unfamiliar solvent combinations on your best build.
Prepare the Surface and Work Area
A transparent finish makes flaws easy to see. Unlike opaque paint, clear coat cannot hide fingerprints, dust, silvering beneath decals, or a rough underlying paint job.
Before applying clear:
- Inspect the model under good light. Correct visible paint defects before sealing them under another layer.
- Remove loose dust carefully. Use a clean, suitable soft brush or a gentle method safe for the existing finish.
- Keep fingerprints away. Handle the model by a secure stand or an unpainted mounting point.
- Protect sensitive parts. Mask or remove clear lenses, canopy glazing, polished metal, rubber parts, or other surfaces that should not receive this product.
- Choose the right conditions. Stay within the product’s temperature and humidity guidance; avoid a dusty or damp environment.
- Read the safety label. Confirm that the spraying method, ventilation, and protective equipment are suitable for the coating.
Don’t Overlook Spray Safety
An airbrush or spray can creates fine droplets that can reach your breathing zone. Solvent-based aerosol or lacquer clears may also produce flammable vapors.
Use a spray area properly designed for the material, with appropriate ventilation and respiratory protection selected for the relevant airborne particles and vapors. A simple dust mask does not protect against organic solvent vapors, and not every hobby spray booth is rated for flammable products.
Keep ignition sources away from flammable coatings and follow the manufacturer’s storage, cleanup, and disposal instructions. If your workspace cannot safely support spraying a particular product, choose a compatible brush-applied alternative or change your setup.
Mix and Thin the Clear Coat Correctly
Clear products may look uniform while sitting in a bottle, but some contain ingredients that settle over time.
Matte and satin clears often contain flattening agents, which make the finish less reflective. Unevenly mixed product can result in inconsistent sheen or pale, chalky patches.
Before Using a Bottle
- Check whether the manufacturer instructs you to shake, stir, or gently mix the product.
- Mix until the contents are uniform, including any material settled at the bottom.
- Avoid adding so much thinner that the product no longer behaves as intended.
- Transfer a small quantity to a separate cup or palette instead of altering the entire bottle.
- If bubbles appear from vigorous mixing, allow them to settle as appropriate before applying.
Is There a Standard Thinning Ratio?
No. Different clear coats use different binders and additives. The correct mixture depends on the exact product, airbrush, application method, and conditions.
Follow the manufacturer’s guidance. For instance, Vallejo’s varnish tutorial demonstrates several product-specific thinning options and stresses multiple thin layers. That example is not a universal mixing formula for other brands.
Do not substitute water, alcohol, lacquer thinner, or household products unless the manufacturer identifies them as compatible.
Watch Out for Flattening Additives
A product labeled flat base is not necessarily the same as a ready-to-use matte clear. Some flat bases are intended to be mixed into a compatible gloss product at the manufacturer’s specified ratio.
Using a flattening additive by itself, or mixing far too much into a clear, can cause a milky or chalky coating.
Applying Clear Coats With an Airbrush
An airbrush offers excellent control over thin layers. It is useful for aircraft, armor, ships, and other models with fine molded detail.
Step 1 - Choose a Product Intended for Airbrushing
Confirm that the clear can be sprayed, and use the recommended thinner and equipment settings if needed.
Step 2 - Test the Spray Pattern
Spray the mixture onto a test surface before approaching your model. Check for sputtering, dry grainy particles, and overly wet puddles.
There is no single correct pressure for every clear. Follow the product and airbrush guidance; adjust flow, distance, and pressure together until the spray is controlled.
Step 3 - Start With a Light Pass
Keep the airbrush moving and lay down a restrained coat. Especially over delicate paint or decals, avoid immediately flooding the surface with a heavy wet pass.
Step 4 - Build the Sheen Gradually
Allow the first pass to settle or dry as directed before applying another.
A gloss finish may require appropriately smooth, continuous coverage to look reflective, while matte finishes can be more sensitive to overly heavy or dusty applications. The correct approach depends on the specific product.
Step 5 - Check the Model From Different Angles
Rotate the model under a light to identify missed areas, uneven sheen, or pooling around details.
Do not keep spraying one small spot to force it to match immediately. Over-application can create a larger defect.
Step 6 - Clean the Airbrush
Follow the clear-coat manufacturer’s instructions for flushing and cleaning. Do not allow leftover varnish to harden inside the nozzle.
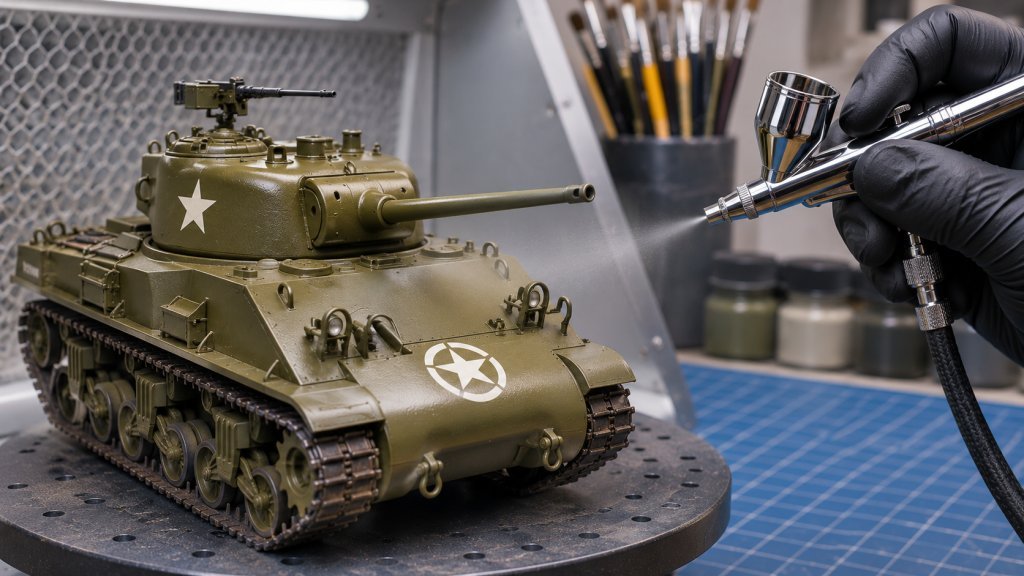
Applying Clear Coats From a Spray Can
Hobby aerosol clears are convenient for large surfaces and for modelers who do not own an airbrush. However, they can deliver substantial coating quickly, so restraint is essential.
A Reliable Spray-Can Routine
- Confirm that the aerosol clear is compatible with the paint, decals, and model materials.
- Check the product’s temperature, humidity, shaking, distance, and recoat instructions.
- Work only in an appropriate spray area with the necessary ventilation and protection.
- Secure the model on a holder so you can rotate it without touching wet surfaces.
- Make a short test spray away from the model.
- Begin spraying just before the pattern crosses the model, move smoothly past it, and release after clearing the edge.
- Apply controlled passes, allowing the recommended time between coats.
- Stop if you see running, puddling, solvent attack, or an unexpected cloudy appearance.
Avoid spraying from so far away that the coating dries into rough particles before landing. But don’t move so close that it collects in a thick wet layer.
The right distance is product-specific; follow the can’s instructions instead of relying on a universal number.
Brush-Applying a Clear Coat
Yes, you can brush-apply certain clear varnishes. In fact, a compatible brush-formulated product is often a practical choice for small components and modelers without spray equipment.
The important phrase is brush-formulated. Not every clear intended for spraying will produce a good brush-painted finish.
Step 1 - Choose a Suitable Clear
Read the instructions and confirm it is intended for brush application. A self-leveling hobby varnish is generally easier to control than a product that dries almost immediately.
Step 2 - Use a Clean, Appropriate Brush
For broad surfaces, choose a soft, suitably sized brush that holds a reasonable amount of varnish. For small details, use a pointed brush with good control.
Avoid brushes with dried paint residue that could contaminate the transparent finish.
Step 3 - Apply a Thin, Even Layer
Load the brush without creating a large droplet. Work across a manageable section with smooth strokes and avoid allowing varnish to pool near raised details.
Step 4 - Leave the Surface Alone
Once the varnish begins to set, repeatedly brushing back over it may leave streaks or lift the earlier layer.
Let it dry as directed before deciding whether it needs another coat.
Step 5 - Inspect Before Recoating
Check for bubbles, brush marks, missed spots, and inconsistent sheen. Correct problems only after the product has reached the appropriate stage for handling or recoating.
Gloss Coats and Waterslide Decals
One of the most common reasons modelers apply a gloss clear is to prepare for waterslide decals.
A smooth surface can help decal film settle closely against the painted surface, reducing pockets of air beneath it. Those trapped pockets are one common cause of decal silvering—the pale or silvery appearance sometimes visible under clear carrier film.
A Practical Decal Workflow
- Let the painted base color dry or cure as the manufacturer requires.
- If the surface is rough or very matte, consider a compatible gloss coat and let it cure sufficiently for decals.
- Apply decals using clean water and any compatible setting/softening products according to their directions.
- Remove excess water carefully without moving or damaging the decal.
- Allow the decals and solutions to dry thoroughly.
- If a protective or blending coat is needed, test and apply a decal-safe clear using restrained passes.
Does Every Model Need Gloss Before Decals?
No. Some already-glossy or sufficiently smooth finishes accept decals well without another layer. Decal quality and application technique matter as much as the sheen of the paint.
A gloss coat can help reduce silvering, but it cannot guarantee perfect decals or repair air trapped under a decal that has already dried in place.
Sealing Decals and Preparing for Weathering
After decals, you may want to protect the markings before applying washes, filters, pigments, or other finishing effects.
A compatible clear coat can sometimes provide that working surface, but the desired sheen depends on the weathering method.
Gloss for Recessed Washes
A smooth gloss surface often allows a compatible pin wash to flow into panel lines and around raised details. It can also make excess wash easier to wipe away without staining the surrounding surface—provided the underlying clear resists the wash’s thinner and has cured appropriately.
Satin for a Balanced Surface
Satin can be a useful compromise when you want some wash control without a highly reflective surface. It may also serve as a convincing final finish for many clean or lightly used subjects.
Matte for Pigments and Certain Broad Effects
A matte surface offers more texture and can help powders or pigments grip. The same texture may also make washes stain more broadly, so a technique intended for gloss might behave differently on matte.
Do You Always Need to Seal Weathering?
Not necessarily. Some pigments, graphite effects, or delicate weathering layers can change noticeably when covered in clear. A final varnish may darken, disperse, or reduce the effect you worked to create.
Test on a sample first. Decide whether the benefits of another clear coat outweigh the changes it may introduce.
Getting a Convincing Final Matte or Satin Finish
A final coat can pull together different paint sheens, decals, touch-ups, and some weathering into a more consistent appearance.
But matte and satin products need particular care.
Mix the Flattening Agents Thoroughly
If the product contains particles that reduce gloss, uneven mixing may create patches with different levels of sheen.
Follow the label instructions and confirm that no heavy sediment remains unmixed.
Don’t Bury the Model in Clear
Too much matte clear may make dark colors appear pale or dusty, especially if the material collects around details or dries in a grainy layer.
Use controlled coats and check the result under consistent lighting. Stop when you achieve the intended effect.
Don’t Make Every Surface Equally Flat
A completely uniform dead-flat finish is not automatically more realistic.
For some models, a restrained satin coat looks closer to painted metal. A tire might remain low-sheen, while a lens or polished fitting should retain a brighter reflection.
What About Mixing Gloss and Matte Products?
Some manufacturers provide compatible products or additives for creating intermediate sheens. Follow that product family’s specific instructions.
Do not assume that combining unrelated varnishes will give a stable, predictable finish.
Special Surfaces: Metallic Paint, Clear Parts, and White Finishes
Some subjects deserve extra caution before you apply an overall clear coat.
Natural-Metal and Metallic Finishes
Certain metallic paints rely on very fine reflective particles or a specialized surface texture. An ordinary clear can reduce their metallic sparkle, darken them, or make them resemble conventional gray paint.
Some metallic paint systems have dedicated compatible sealers. Follow the system’s instructions and test before coating a full model.
Canopies, Windows, and Lenses
Don’t automatically spray the same clear over transparent glazing. Solvents, overspray, or unwanted sheen can haze or distort a clear canopy.
Mask glazing or treat it separately using products specifically approved for clear parts. Don’t use aggressive cleaners on damaged glazing without checking compatibility.
White and Very Light Colors
Cloudy matte clear, contamination, or yellowing can be especially obvious on white paint. Test the product and observe the finish after drying or curing, not just immediately after application.
Gloss Automotive Finishes
A highly reflective car finish demands smooth preparation. Clear coat emphasizes underlying roughness; it does not erase orange peel or sanding defects.
If the product is designed to be polished, do so only after its specified curing period and using compatible polishing methods. Not every hobby clear is intended for polishing.
Delicate Decals and Raised Details
Some metallic decals, foil, photo-etched details, and very thin markings can change or be damaged beneath clear. Decide whether they need to be left uncovered, attached after varnishing, or protected using a specialty product.
Drying, Curing, and Handling the Finished Model
Dry to the touch does not always mean fully cured.
Drying may involve water or solvent leaving the coating. Curing can involve additional changes that develop the finish’s intended hardness and resistance. Exact behavior depends on the formulation.
Why You Should Wait
Handling or masking too early can leave fingerprints, scuffs, tape impressions, or damaged decals.
Applying the next coat before the previous one is ready can also contribute to trapped solvent, uneven sheen, or a soft finish.
Always follow the specific product instructions for:
- Time between coats.
- When decals or weathering can be applied.
- When masking or polishing is permitted.
- When the model can be handled or packaged safely.
Temperature, humidity, airflow, and coat thickness may change these times.
Keep Dust Off While It Cures
If practical, place the model in a clean, protected drying area that does not touch the surface and still meets the product’s ventilation requirements.
Avoid covering a freshly coated model with an airtight container if the product requires solvent evaporation and ventilation.
Common Clear-Coat Problems and How to Fix Them
A clear coat can look excellent on one test and troublesome on another. Work through the possible causes before adding more varnish.
| Problem | Possible Cause | What to Do |
|---|---|---|
| Cloudy, white, or frosted finish | Moisture-related blushing, dry overspray, excessive flattening agent, or heavy matte application | Stop coating; allow full drying, check humidity and mixing, then test a manufacturer-approved correction on scrap before touching the model |
| Orange peel or pebbled gloss | Poor leveling, unsuitable spray setup, underlying texture, or overly thick application | Correct the spray technique and mixture on a test piece; smooth or polish only when the clear permits and is sufficiently cured |
| Runs or pooling | Too much wet clear deposited in one area | Stop applying; let it dry or cure, then correct the defect using a product-safe method |
| Uneven sheen or glossy patches | Inconsistent coverage, uneven mixing, different underlying textures, or touch-ups | Mix thoroughly, improve evenness on a test piece, and add a controlled coat only if needed |
| Grainy or dusty surface | Clear drying before reaching the model, poor atomization, or excessive spray distance | Adjust distance, airflow, and thinning as instructed; correct the rough layer after curing if appropriate |
| Wrinkling or softening of paint | Solvent attack, incompatible products, or insufficient curing | Stop immediately; let the finish stabilize and evaluate whether the affected area needs careful repair or removal |
| Decals lifting or reacting | Aggressive solvent, heavy wet coat, trapped moisture, or insufficient decal drying | Stop coating and allow the model to dry; test a decal-safe alternative before repeating |
| Milky streaks with a brush | Overworking, bubbles, poor mixing, incompatible thinning, or too much varnish | Test a brush-friendly product, apply a thin coat, and avoid repeated passes over drying material |
| Metallic finish loses its sparkle | Clear changing reflectivity or disturbing the metallic layer | Test a dedicated metallic sealer or leave the metallic finish uncoated when appropriate |
| Dust trapped in gloss | Contaminated surface, workspace, or drying area | Allow curing; remove or polish imperfections only if the product supports it, then retest the finish |
What to Do When a Matte Coat Turns White
Don’t immediately try to cover the cloudy area with another heavy coat. The correct remedy depends on whether the problem is moisture blushing, excess flattening agent, rough overspray, or chemical incompatibility.
Let the coating dry fully and diagnose the cause. A manufacturer-approved recoat or compatible gloss layer can sometimes improve certain matte haze problems, but it is not a universal fix. Test any recovery procedure on an identically painted spare piece first.
Frequently Asked Questions
Do I always need to apply a clear coat?
No. If the paint already has the correct sheen and you do not need a decal-preparation layer or a barrier for weathering, you may not need one.
Is satin the same as semi-gloss?
They overlap, but manufacturers do not use the terms identically. Compare actual test pieces rather than assuming products with different labels will match perfectly.
Do I have to gloss-coat a model before decals?
Not always. A sufficiently smooth underlying paint can work well. Gloss is helpful on rough or matte finishes because it can reduce air pockets beneath decal film, but decal quality and application technique still matter.
Can I apply matte clear directly over decals?
Sometimes, if the decals are fully dry and the clear is compatible with the decals, setting solutions, and underlying paint. Test first and avoid aggressive wet coats. A separate gloss coat is not mandatory in every workflow.
Can I spray lacquer clear over acrylic paint?
Some combinations work, but “acrylic” covers different formulations. Lacquer solvents can attack certain paints and decals. Use manufacturer compatibility guidance and a representative test piece.
Will a clear coat protect my model from scratches?
It may offer some resistance to ordinary handling, depending on the product, but it will not make paint scratchproof or compensate for poor adhesion beneath it.
Why did matte varnish turn my dark paint gray?
Possible causes include excessive or uneven matting agent, a cloudy layer, and an application that dried rough. Stop, let it dry, and diagnose the cause before trying a corrective coat.
Can I brush on clear varnish instead of airbrushing it?
Yes, when the product is formulated for brush application. Use a clean brush, controlled thin coats, and avoid overworking a layer that has started to set.
Does clear coat change metallic paint?
It can. Some clears noticeably dull or darken metallic effects. Use a compatible dedicated sealer if required and test it over the exact metallic color first.
Is a matte finish always more realistic for military models?
No. Actual finishes varied by material, era, maintenance, weathering, and restoration. Matte or satin may be appropriate for large surfaces, while certain details should retain more sheen.
Your Clear-Coat Checklist
Before calling your latest model finished, check the following:
- I know whether I need gloss, satin, matte, or no additional clear coat.
- I have checked the reference subject and the desired appearance.
- My clear product is appropriate for the base paint and application method.
- I have tested the complete paint, decal, and clear combination on spare material.
- The model is clean, dry, and free of loose dust.
- Canopies, lenses, metallic areas, and other sensitive parts are protected as needed.
- My spray area, ventilation, and personal protection are suitable for this product.
- I have mixed the varnish as instructed, especially if it contains flattening agents.
- I have used only a compatible thinner, if thinning is required.
- I have applied controlled layers rather than one heavy coat.
- I have inspected the finish under consistent lighting.
- Decals and weathering are sufficiently dry or cured before being overcoated.
- The finished model has been given the required curing time before handling.
If the finish looks right and the model has been treated with suitable products, you’re ready to enjoy the result.
Final Thoughts: Finish for the Model, Not the Bottle
Gloss, satin, and matte clear coats are three different tools for controlling how your paint job looks. None is universally “best,” and none belongs on every part of every model.
Use gloss when a polished appearance or smoother working surface is needed. Choose satin for a softer, often convincing painted-metal sheen. Use matte when you want to reduce reflections and bring weathered or military finishes together—but keep it thin, mixed properly, and compatible with the layers beneath.
The strongest results come from a simple routine: plan the finish, test the products, prepare the surface, apply controlled coats, and allow the coating to cure.
Happy modeling!
— Duneland Model Club
Continue Learning
Each of these guides covers a step that helps you reach the finishing stage with a better foundation.